Setting permissions for a role
To configure rights for the current role, do the following (see Users, roles, groups – roles):
-
Expand the appropriate group of permissions; see following chapters for descriptions of permission groups:
-
To specify permissions for an entry in the first column, do the following:
-
Select the check box Enabled / Disabled / Undefined for the desired operation.
-
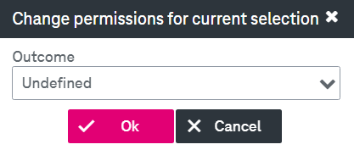
Alternatively, click Change Rights at the bottom of the expandable panel to set all permissions of the selected row to a single value.

-
-
Change the value as desired and click Ok.
-
Click Save.
Each right may have the following values:
-
Enabled: The right is permitted.
-
Undefined: This is the initial default setting which prohibits the right. Normally, when setting up a new environment, you only have to enable the required functionalities for a role.
-
Disabled: The value means that the right is explicitly prohibited.
NOTE:
It is not recommended disabling any rights unless this is required by your role model and explicitly advised by an ImageMaster architect.Disabling a right explicitly is only needed in rare cases and it is not necessary in common scenarios. In practice, it has been observed that disabling a right often yields an undesired overall result when combining roles. It can cause missing rights that are required for very basic operations, so it happens easily, for example, that users all of a sudden cannot access a document anymore.
For related details see chapter Combining roles and in particular consider table Roles management – role combination and intersection example, which exemplifies the effects of role combinations.