Dialogue sequence for database creation in Oracle 19c
The following screenshots present the installation dialogues which are provided by the database configuration assistant. In each step it is possible to display help information, to go back to the previous step or to stop the installation.
-
After launching the assistant, click Next in the welcome dialog.
Step 1: database operation
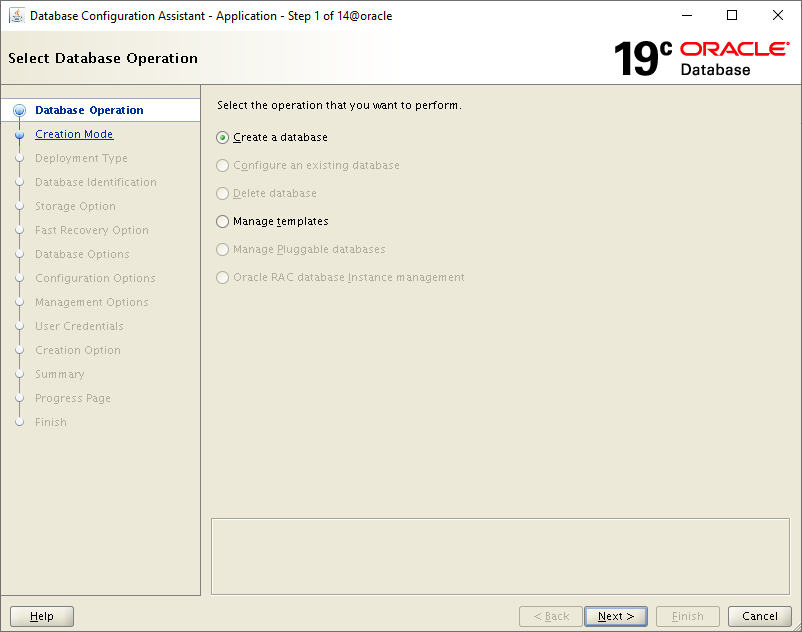
Figure 610: Database Configuration Assistant – select database operation
-
Select the option Create a Database and click Next.
Step 2: creation mode
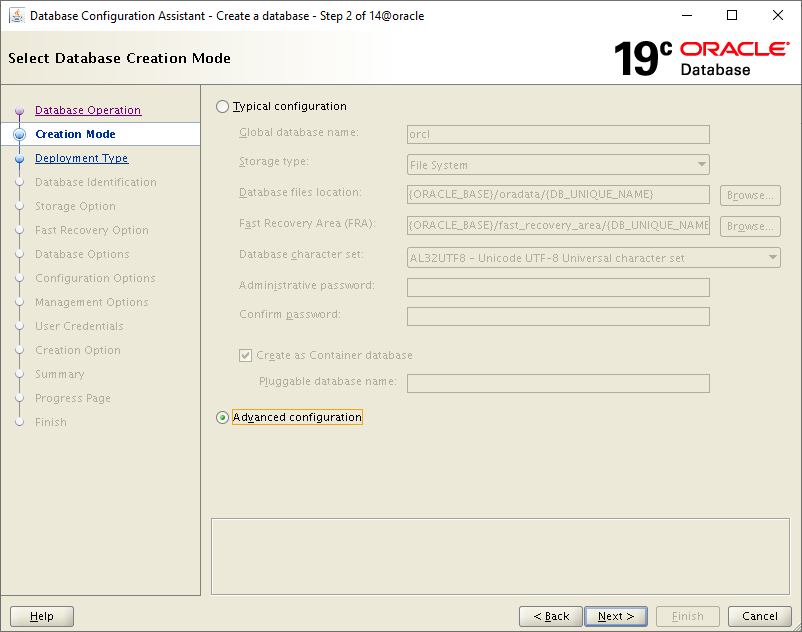
Figure 611: Database Configuration Assistant – select database creation mode
-
Select the option Advanced configuration and click Next.
Step 3: deployment type
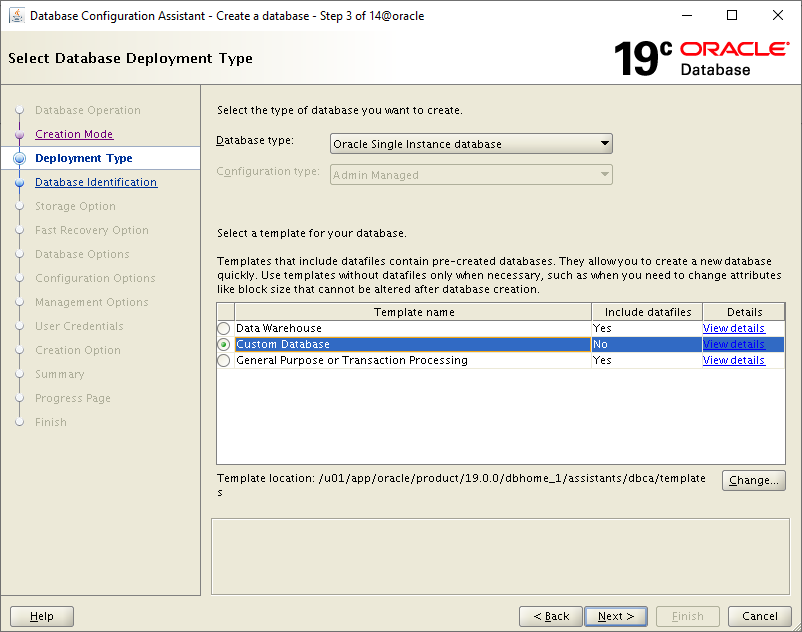
Figure 612: Database Configuration Assistant – deployment type
-
Select the option Custom Database and click Next.
Step 4: database identification

Figure 613: Database Configuration Assistant – database identification
-
Enter a database name and a system SID, e.g. imacdb.
In the example above the check box Use Local Undo tablespaces for PDBs is selected that allows each container in an instance to use its own undo tablespace. Select Create as Container database to create one CDB with possibly multiple PDBs in it (the multitenant feature is supported from Oracle version 12c). Specify Number of PDBs and PBD name(s), e.g.ima9 to create a database as a CDB. See [Multitenant Architecture] for more information on the multitenant architecture. Click Next.
Step 5: storage option
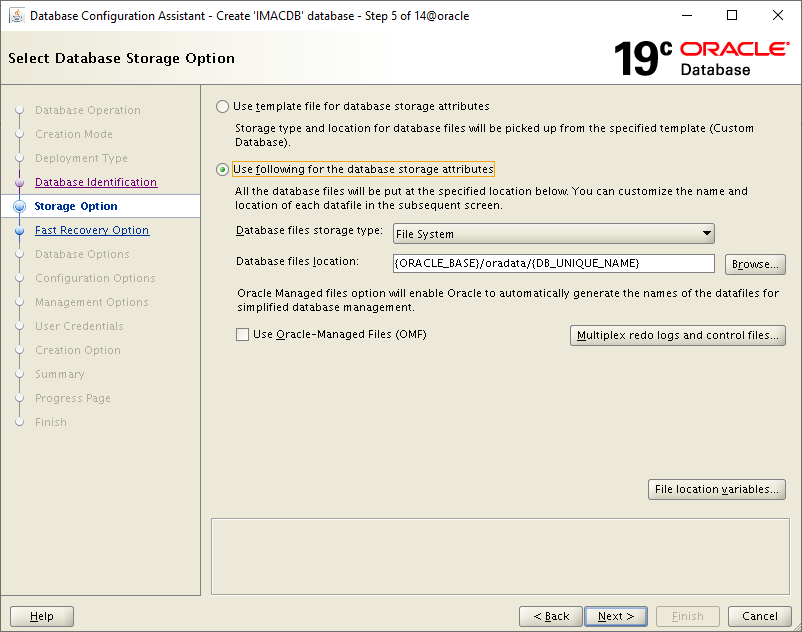
Figure 614: Database Configuration Assistant – storage options
-
Adjust the database storage options as desired and click Next.
In the above example the storage type File System is selected. This stores all files into the file system at the defined location.
Step 6: fast recovery option
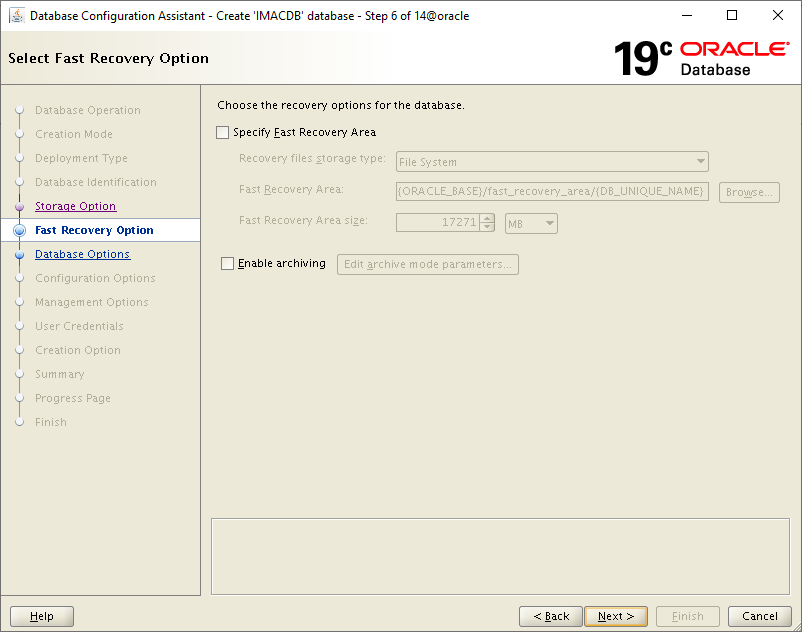
Figure 615: Database Configuration Assistant – fast recovery option
-
Adjust the fast recovery options as desired and click Next.
The optimal setting depends on the backup strategy. In case of a database error, databases in ARCHIVELOG mode can be fully recovered to the current transaction status by means of the archive logs. However, for databases with high writing activity, this can easily lead to an overflow of the disk partition, so regular monitoring is required.
Also see the previous step for a brief explanation of the storage type option.
Step 7: network configuration

Figure 616: Database Configuration Assistant – network configuration
-
Adjust the listener options if required and click Next.
Step 8: database options
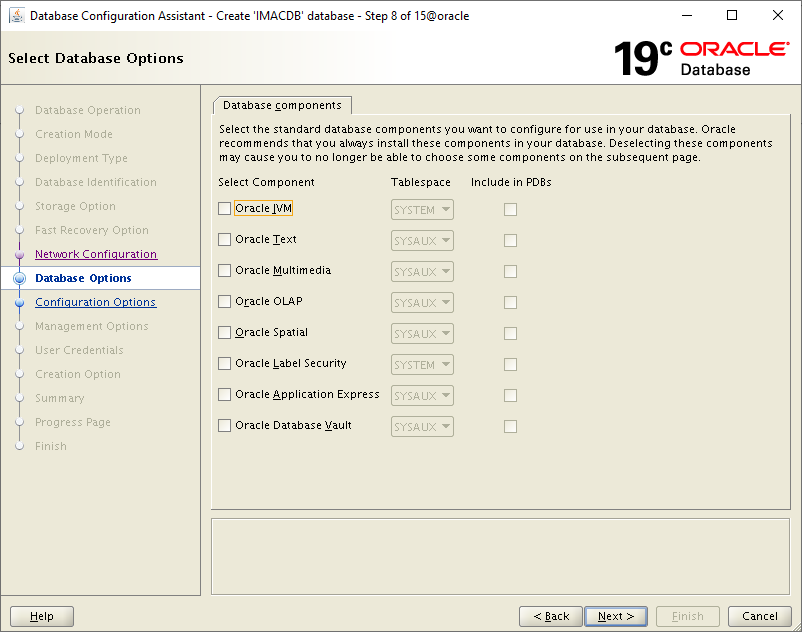
Figure 617: Database Configuration Assistant – database credentials
-
Adjust the database components as required and click Next.
The options (Oracle Label Security, Oracle Application Express and Oracle Database Vault) are optional. ImageMaster does not require any additional components to function correctly. If you want some options to be configured in your custom environment, you can select them in the following dialog.
-
Click Next.
Step 9: configuration options
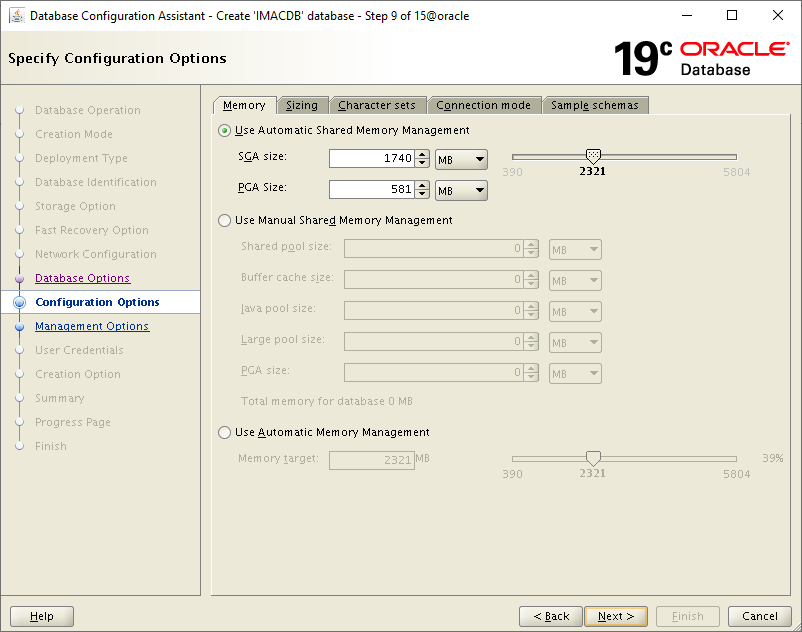
Figure 618: Database Configuration Assistant – memory
-
Use automatic shared memory management with the suggested default values, unless other settings are explicitly required in your environment.
Finding the optimal memory parameters is highly dependent on the available memory (RAM), the performance requirements and whether parallel installations of other database instances are in place.
For Unix platforms the configuration advice given in the Oracle documentation [Install Guides] should be taken into account before installation, too.
-
Select the next tab Sizing.

Figure 619: Database Configuration Assistant – sizing
-
Use the suggested default values unless other settings are explicitly required in your environment.
You can specify two values here:
-
Block size: This is the block size of data blocks that Oracle uses for reading and writing. It is advisable to adapt this value to the size of the blocks used by the underlying operating system. On most Unix systems this is 8192 bytes.
-
Processes: The optimal number of processes depends on the expected load of the system. Use the default, if you have no other information at hand.
-
-
Select the next tab Character sets.
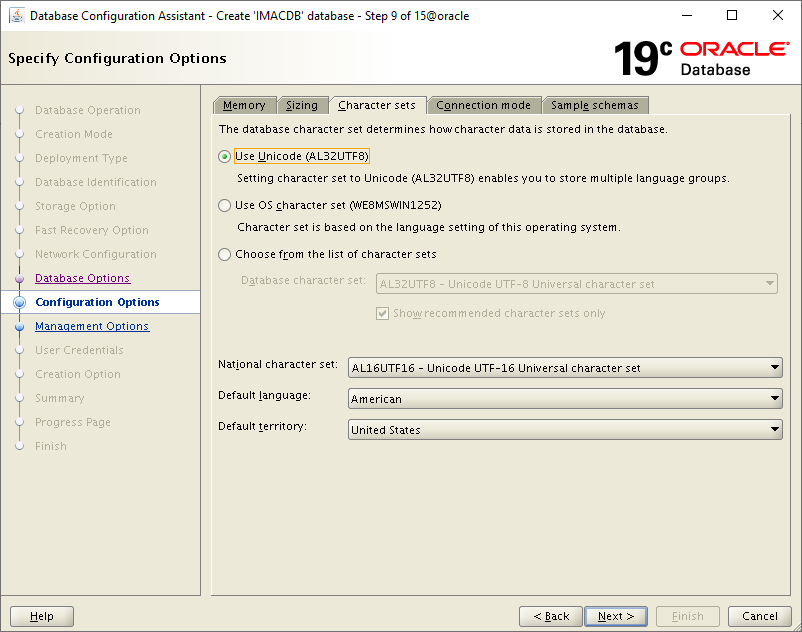
Figure 620: Database Configuration Assistant – character sets
-
Use Unicode (AL32UTF8). (The National Character Set is not usable by ImageMaster.)
-
For the default language choose American with the default territory United States.
The default territory parameter affects the sorting order of hit lists in the application.
-
-
Select the next tab Connection mode.
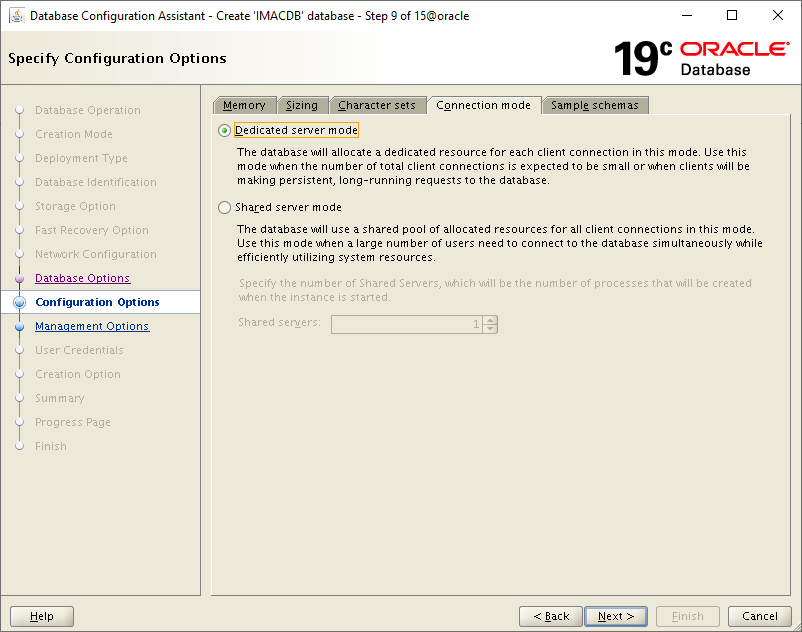
Figure 621: Database Configuration Assistant – connection mode
-
Select Dedicated server mode and click Next.
Step 10: management options
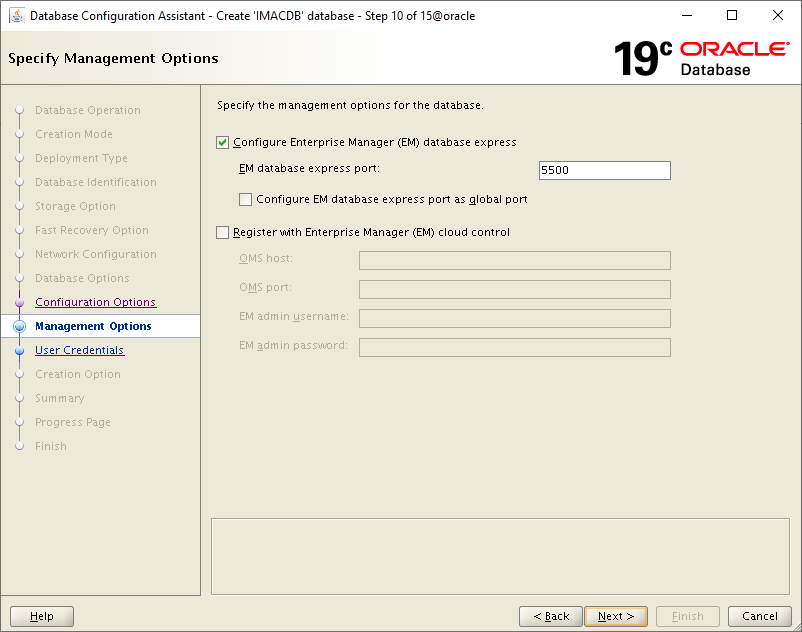
Figure 622: Database Configuration Assistant – management options
-
In a standard environment it is recommended enabling Enterprise Manager database express as illustrated above. This facilitates basic administrative tasks such as storage and user management:
-
Adjust the port number as desired and click Next.
Step 11: user credentials
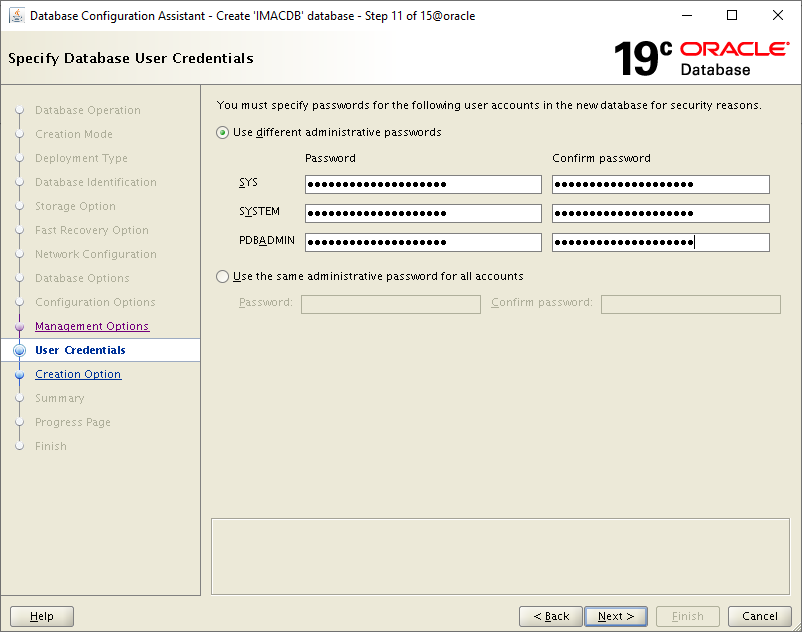
Figure 623: Database Configuration Assistant – user credentials
-
Set the passwords for the required user accounts (PDBADMIN is a special user with rights to administer the PDB). Click Next.
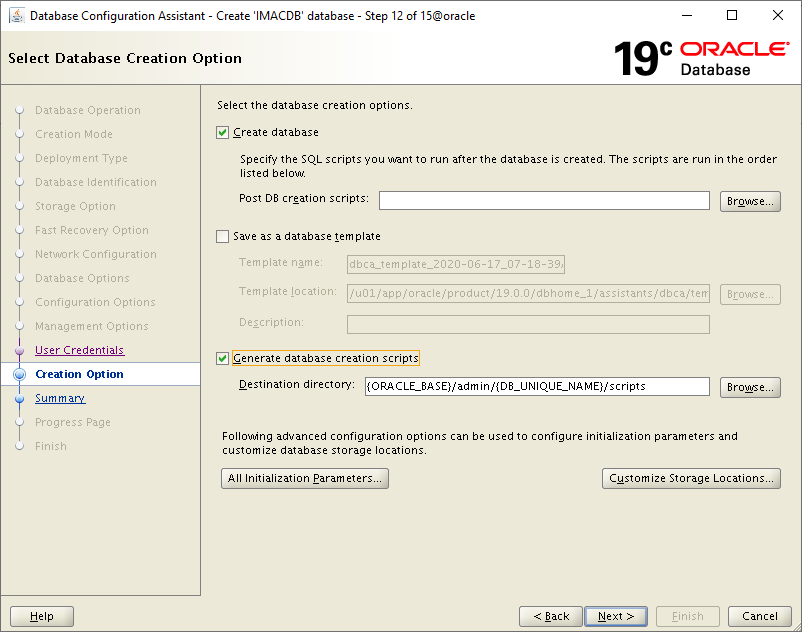
Step 12: creation option
-
Select the option Generate database creation scripts.
-
Click All Initialization Parameters… to review the installation details:
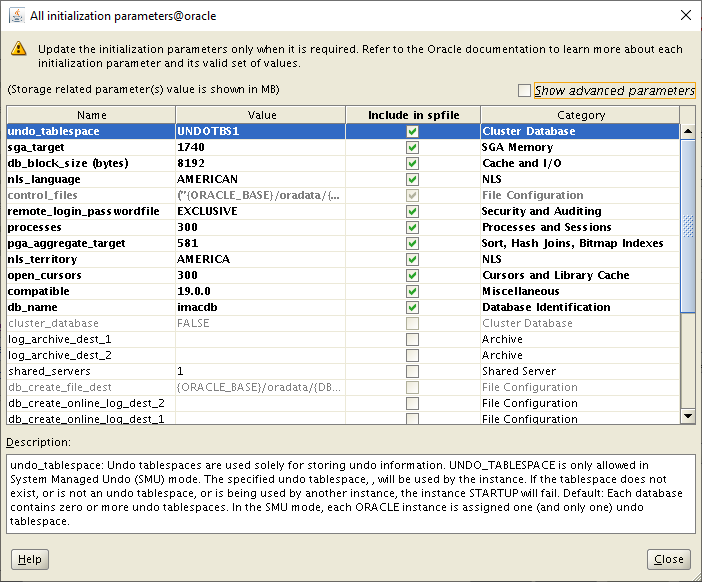
Figure 625: Database Configuration Assistant – all initialization parameters
-
Close this dialog and click Customize Storage Locations… in the parent dialog (see previous step Database Configuration Assistant – creation option) to revise the storage location and size details:
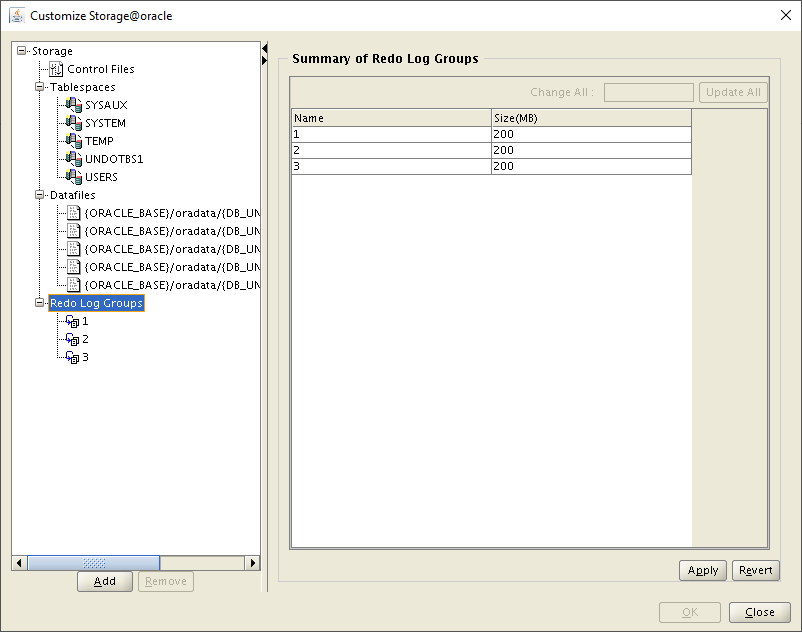
Figure 626: Database Configuration Assistant – customize storage (1/2)
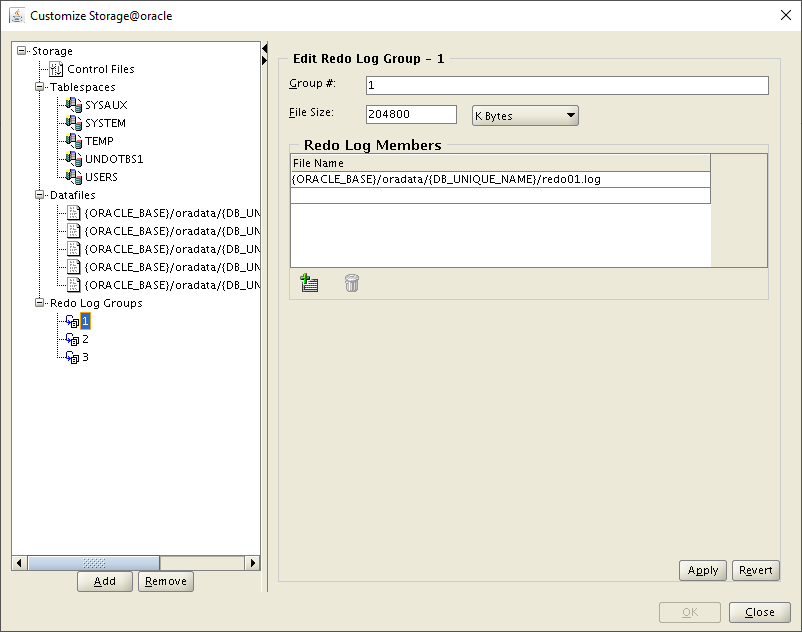
Figure 627: Database Configuration Assistant – customize storage (2/2)
Some recommendations for tablespaces are listed below:
-
In normal operation mode the default settings for the redo logfiles are good. Only for support actions (e.g. for an upgrade) it may be useful to increase these settings.
-
Tablespace SYSAUX: minimum 300 MB
-
Tablespace SYSTEM: minimum 500 MB
-
Tablespace TEMP: minimum 100 MB (needed for sort operations)
-
Tablespace UNDOTBS: minimum 200 MB (dependent on transaction volume of system)
-
Tablespace USERS: can be removed. It is not used by ImageMaster.
-
-
Close the dialog and click Next in the parent dialog to start the installation.
Step 13: summary
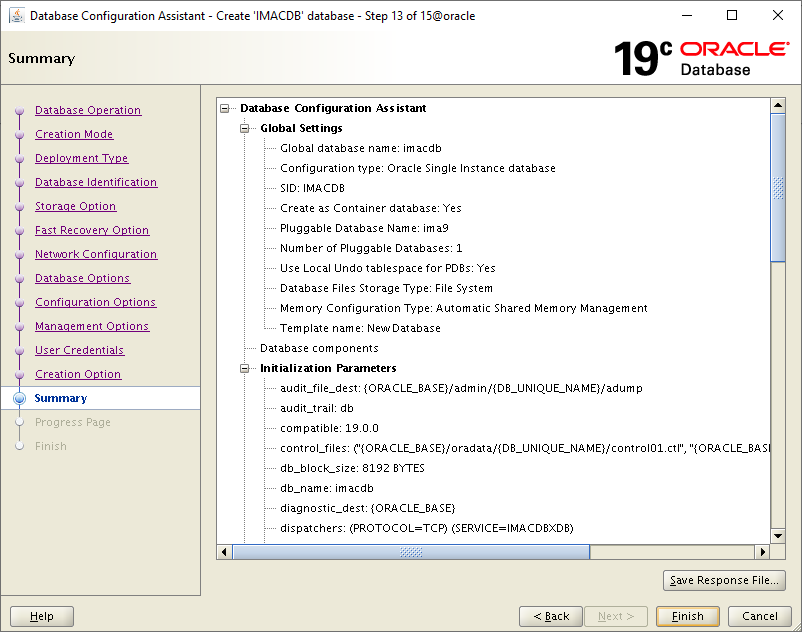
Figure 628: Database Configuration Assistant – summary
-
Click Finish to trigger the installation. The Progress View page displays the installation progress.
Step 14: progress page
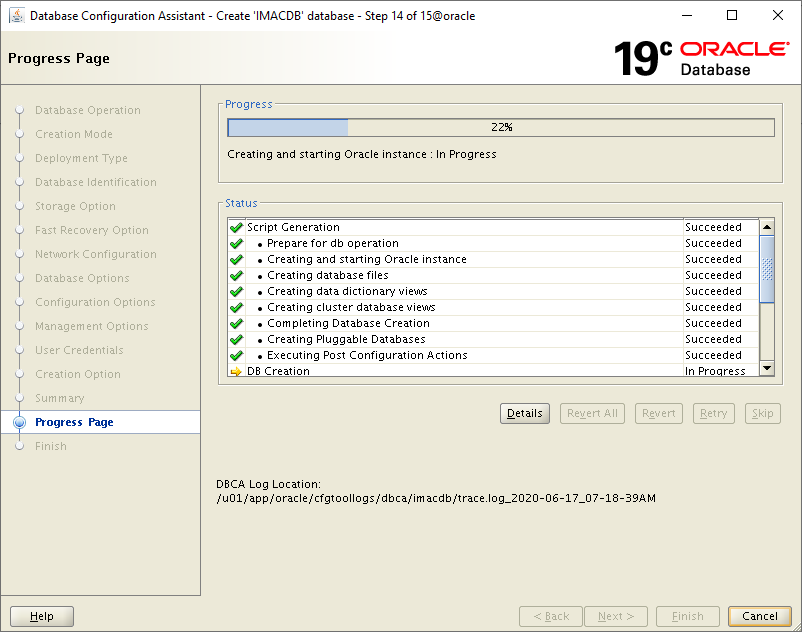
Figure 629: Database Configuration Assistant – progress page
-
If successful, the corresponding message appears. Click Close to finalize the database creation.
Step 15: finish
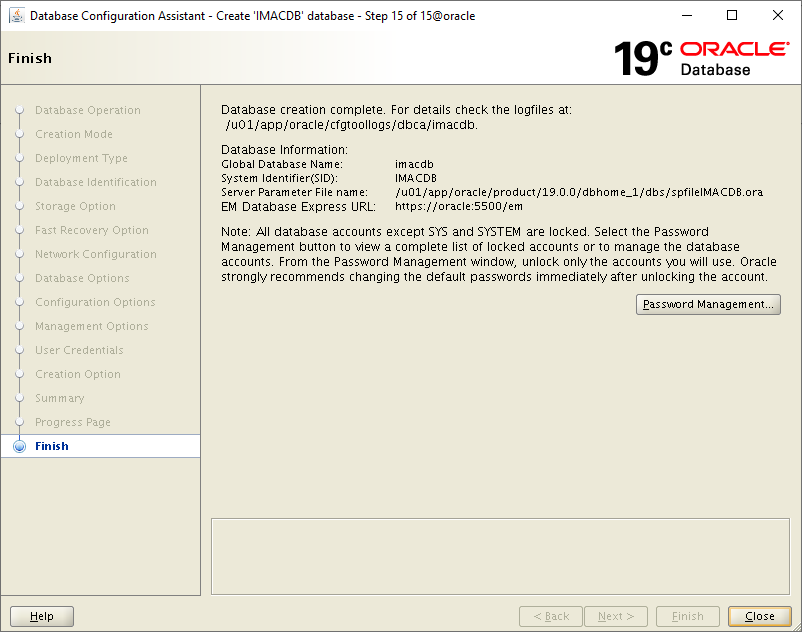
Figure 630: Database Configuration Assistant – finish