Configuring audit rules
All created rules are displayed in the rules list. Select an item and adjust its properties in the right panel in subtabs: Rules, Event Filter etc.
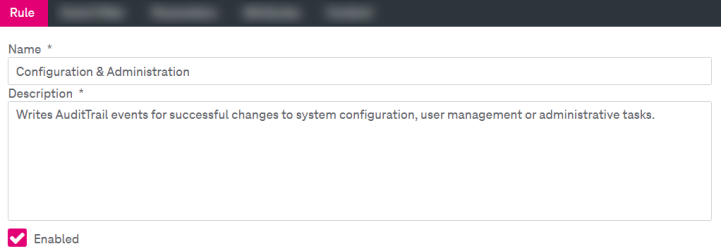
Figure 68: System – audit: rule
Rule tab
On the Rule tab, configure main parameters of the rule.
-
Name (mandatory): Specify a unique name which will be displayed in the rules list and only used for administrative purposes.
-
Description (mandatory): Enter a brief overview about what the rule is intended to audit.
-
Optionally check / clear Enabled to enable or disable the selected rule.
Event filter tab
Click the Event Filter tab to create filters which determine when the rule shall be applied. If you leave the entries empty, the audit rule will always fire and cover all possible combinations of events and statuses, which will respectively increase database storage usage.
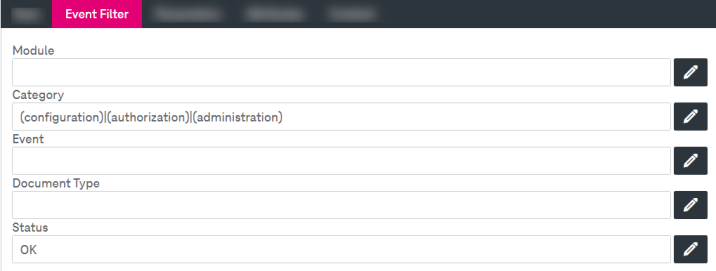
Figure 69: System – audit: event filter
The page includes the following filters:
-
Module: components like Web Service, Web Client, Integration Service, Retention Management, or relating to third-party components like SAP
-
Category: use cases like configuration, authorization, or administration
For a full list see Audit trail events in [SM IS].
-
Event: internal methods like createDocument or checkoutDocument
This can be any web service method according to the developer references [WS AdminClient] and [WS IS].
-
Document Type: the available document types (that have been set up e.g. via the AdminClient)
-
Status: an error code
For example:
-
OK to filter only for successful operations
-
PERM-08000 to filter for a PERMISSION_DENIED error
-
Any ImageMaster error code with a wildcard such as DOC-*
The status prefix can be any existing ImageMaster error code. There are more than 1000 error codes. An overview is available in a separate sheet [Error DB]. This can be used as a starting point for further analysis if use cases require to filter for specific error constellations. See Common web service error codes in [SM IS] for an overview of the abbreviations that are used in error codes.
-
To specify a status filter, do the following:
Click the “Select filter values” icon  next to a filter field to open a dialog with all entries available for this field:
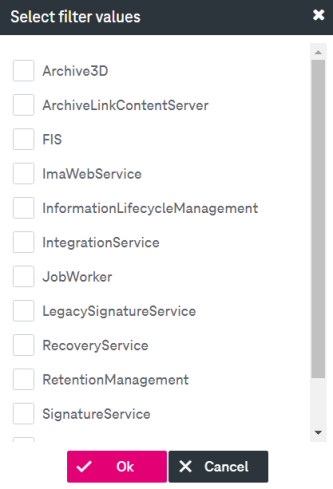
Figure 70: System – audit: filter values
In the dialog, do as follows:
-
Choose one or several entries by selecting the corresponding check box(es).
-
Click OK to save your changes or Cancel.
The system generates a corresponding regular expression (see chapter Support of regular expressions) in the filter field.
You can enter or edit a regular expression manually. For example, the expression .*Role could be used to include all events that end with the suffix “Role” such as: createFISRole, createRole, deleteRole, updateRole.
Parameters tab
Click the Parameters tab to define the parameters that are actually written into the audit trail.
To include all available parameters, click All Parameters (selected by default).
To compose a list of parameters to be included in the audit log, do as follows:
-
Click Selected Parameters. A drop-down list with available parameters appears below and depends on the Module / Category / Event filter configuration specified in the Event Filter tab (see the section above for details).
-
Select a property from the list. A new empty drop-down list appears below.
Repeat this action until the list of properties has been composed. Each drop-down list has the same set of properties. A duplicate selection will not affect the result.
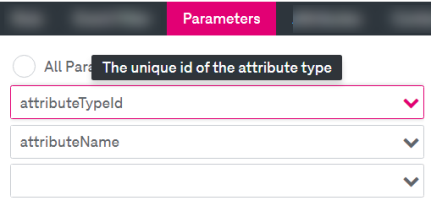
Figure 71: System – audit: parameters
If you hover the mouse pointer over a drop-down list with a selected value, a tooltip appears showing the description of the parameter. If the parameter belongs to several events, the tooltip may include descriptions for all related events.
Attributes tab
Click the Attributes tab to select document type specific attributes that are written into the audit trail. It does only make sense to select attributes of document types that are actually covered by the event filter.
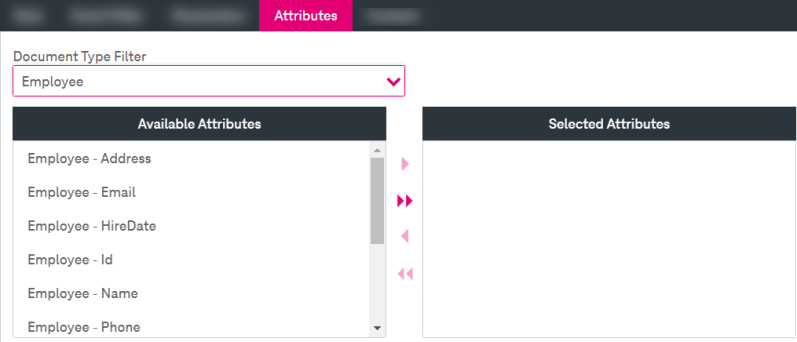
Figure 72: System – audit: attributes
To compose the list of attributes, do as follows:
-
To restrict the list of available attributes by a single document type, select an item from the Document Type Filter drop-down list.
If you leave Document Type Filter empty, the Available Attributes box displays a full list of attributes for all document types.
-
Compose the list of Selected Attributes from the list of Available Attributes using right / left arrows. Each attribute is displayed in the following format: “<document type> - <attribute name>”. The list is sorted alphabetically by document types (if applicable), and by the names of attributes inside each document type.
Although document types and attribute names are shown with their localized labels here, usually these are finally replaced by their technical names.
Content tab
Click the Content tab to select specific content attributes that will be written into the audit trail whenever an audit event references a document with binary content.
Select the check boxes of the binary content items that you want to write to the audit trail:
-
File Name: the name of the binary content file
-
MIME Type: the MIME type (see chapter MIME type settings)
-
File Size: the size of the file
-
Archive Reference (URL): the archive reference or URL of the binary content
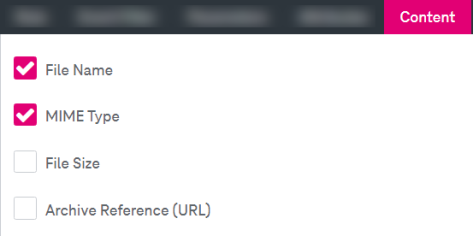
Figure 73: System – audit: content