FIS configurations are managed by profiles. A FIS command call will always extract certain base parameters from a profile. The profile name itself must be specified as a parameter in a FIS command line call.
Profile parameters may be overridden by FIS command line parameters!
You can perform the following actions with FIS profiles:
-
add and delete FIS profiles
-
change an existing profile
To add a new profile
-
Do one of the following:
-
Click Add FIS Profile to add a new profile with default field values.
-
Alternatively, click Copy FIS Profile to add a profile with the same values as the current profile.
-
-
Adjust the parameters as desired (see section “To change an existing profile” for details).
-
Click Save.
To delete a profile
-
Select a profile to be deleted by clicking the corresponding profile tab.
-
Click Delete FIS Profile and confirm.
-
Click Save.
A validation check is performed first. This check ensures that:
-
exactly one profile is marked as the default profile (property profile.Default)
-
the default profile is always enabled (property “profile.Enabled”)
-
mandatory fields are filled
If the check fails, an error message is displayed. To revert to the existing configuration, click Refresh.
-
-
Select an existing profile by clicking the corresponding profile tab.
-
Complete the field values, mandatory fields are marked by an asterisk (*). See table FIS – profile management parameters below for field descriptions.
-
To select the default access roles for the FIS profile, click Create Default Access Roles on the bottom of the screen. The FIS Roles dialog is displayed.
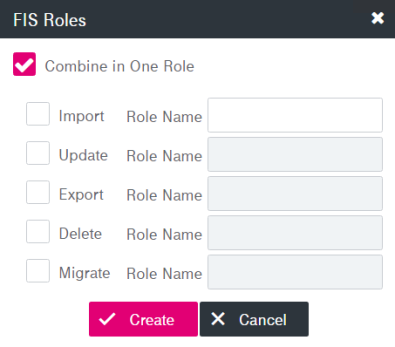
Figure 66: System – FIS: FIS roles
-
Select or clear the desired boxes:
-
Import
-
Update
-
Export
-
Delete
-
Migrate
-
-
For any selected role specify the exact Role Name that was set up for this purpose in your environment, unless you combine the roles (see next).
-
If you select Combine in One Role only the name entered in the upper Import field is used. Otherwise, if this check box is clear, each selected role must have its own respective name.
-
Click Create to add the appropriate access role(s) in the repository. If roles have been created successfully, an information message appears. Click OK.
-
Click Save.