ImageMaster Business Process Management (BPM) is used to produce, track, edit, store, and manage documents associated with a business process. Users with enough permissions can start a workflow process. A workflow is a sequence of tasks that processes a set of data.
-
From the document preview or view expand the menu Workflow and select Start Workflow. In case only one workflow is configured, the button will display its name. If several workflows are available, select the desired one from the submenu.
-
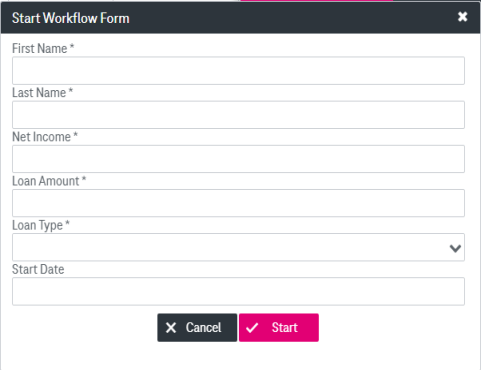
The Start Workflow Form will be opened in an overlay window.
Note that the workflow functionality is customer specific and depends on your configuration. The fields shown below are only examples, and they also depend on the selected workflow.

Figure 922: Defining workflow details for a document
-
Adjust the fields as desired and click the Start button to proceed. If successful, a corresponding message is shown and the workflow will be available in My Tasks.
-
Go to the document detail view or preview, expand the menu Workflow and select Show tasks from the menu.
-
The My Tasks room opens and displays tasks for the currently selected document. For more details see Handling workflow tasks (ImageMaster BPM).
-
Go to the document detail view or preview, expand the menu Workflow and select Show diagram from the menu.
-
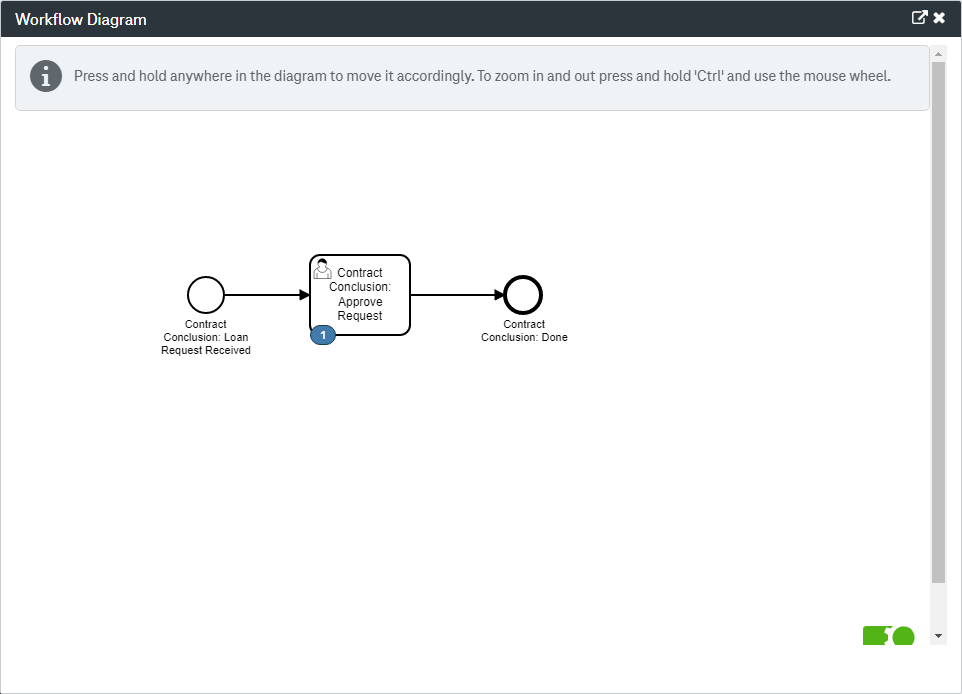
A diagram will be shown in a separate overlay window with an overview of the single process steps:

Figure 923: Workflow diagram
-
Press and hold anywhere in the diagram to move it. To zoom in and out, press, and hold “Ctrl”, and use the mouse wheel.
-
To close the window, click the cross sign in the upper right corner of the window.
-
Go to the document detail view or preview, expand the menu Workflow and select Show history from the menu.
-
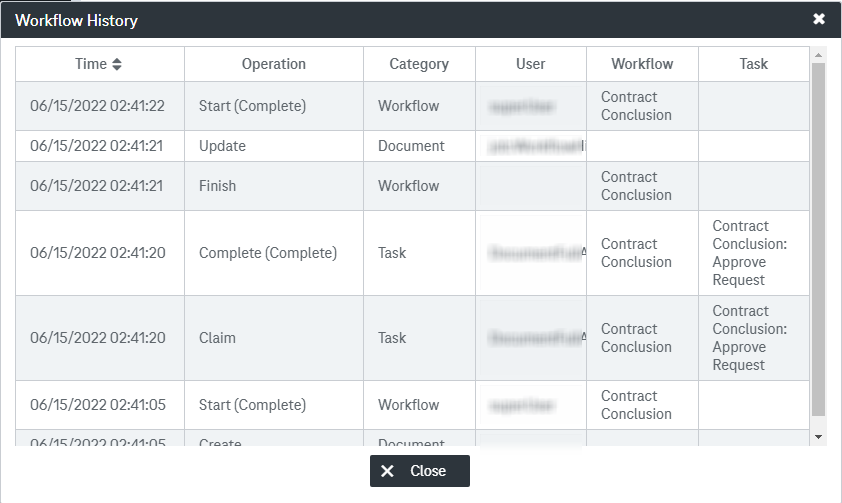
The workflow history will be shown in a separate overlay window:

Figure 924: Workflow history
The Workflow History shows an overview that combines the document status with the workflow and task status:
-
Time: the date and time when an operation was executed
-
Operation: an operation depending on the category:
-
A task, for example, can be claimed or completed by a user.
In case of a completion, an additional final status for the operation can be shown such as “Approved” or “Rejected”.
-
A workflow can be started or finished.
-
A document can be created or updated.
-
-
Category: “task”, “workflow” or “document “
The category determines, which operations are possible.
-
User: the display name of a user or job triggered the operation
-
Workflow: the name of the workflow, which is associated with a specific sequence of tasks
For the category “document” the workflow field can be empty because an operation on a document can be triggered outside of a workflow.
-
Task: a step in a workflow that is handled by a user
The last executed task is shown for entries of the category “task”.
-
-
To close the window click the button Close.