To create a new document in ImageMaster, execute the following steps:
-
Click on the menu Document and hover the mouse pointer over the item New in this menu:

Figure 911: Creating a new document via the workspace “documents“
-
A similar menu can be accessed from locations other than the documents workspace such as the hit list.
-
The function “New” is available in the hit list if the user has the permission to create documents for the currently selected document type.
-
Hovering the mouse pointer over the item “New” shows a list of available document types for which you have permissions.
-
-
Select the desired document type.
-
You can only create a new document of a type for which you have the permissions.
-
A dialog like the following is shown:
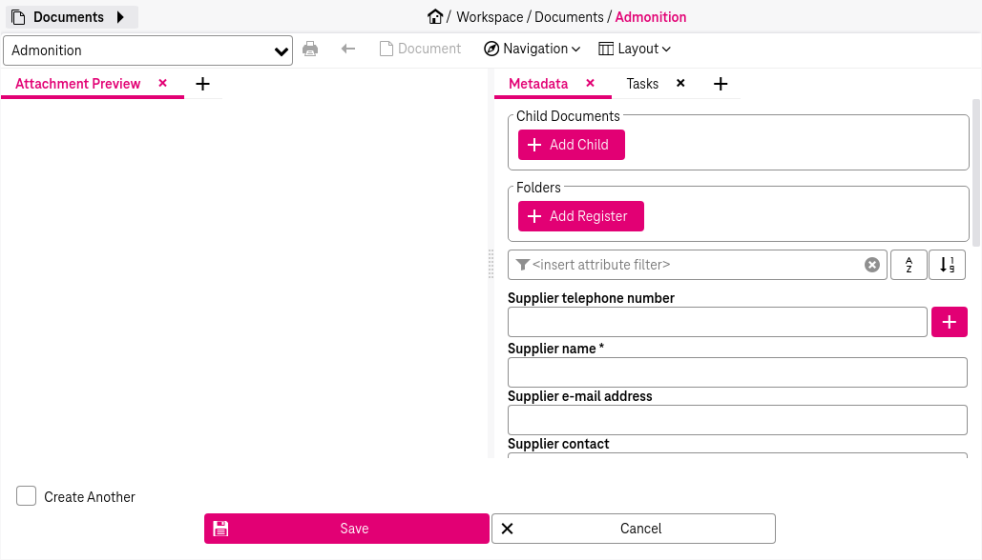
Figure 912: Document creation dialog
-
-
Add attachments to the document.
-
A dialog is displayed that lets you select a file to upload from your local system or drag it directly to the panel.
-
If Classify & Extract functionality is available and configured for the selected document type, a Classify & Extract button is displayed in the document creation dialog. Click it to trigger automatic document type detection and metadata extraction. See section Classify & Extract for details.
-
Also see chapter Working with document attachments.
-
-
Optionally, adjust the field display.
-
The attribute filter is only available if all mandatory fields have been filled.
-
Also see chapter Sorting and filtering of input fields.
-
-
Enter values in the attribute fields.
-
The fields that are displayed depend on the selected document type.
-
Also see chapter Modifying attributes.
-
-
Optionally, select the box Create Another if you immediately want to create a further document.
In this case attribute values of the previous document are taken as defaults for the next document unless default values have been configured for the document type.
-
To confirm your modifications, click Save.
It is possible to create new document by dragging files in the hit list:
-
Go to the Search tab.
-
Drag files in the hit list area (even if there are no search results), a drop area appears. with the following options:
-
After the upload completes, a popup is displayed with the following options:
-
Create Single Document
A new document is created with all dropped attachments. The document is opened in the Document Creation view. Adjust the fields if desired and click Save.
-
Create Multiple Documents
A new document will be created for each file. The first document is opened in the Document Creation view. Adjust the fields as desired and click Save.
Optionally select the box Classify & Extract if you want the system to automatically detect the document type and extract metadata from thee uploaded file using AI. This option is only available if the functionality has been configured by your system administrator. See section Classify & Extract for details.
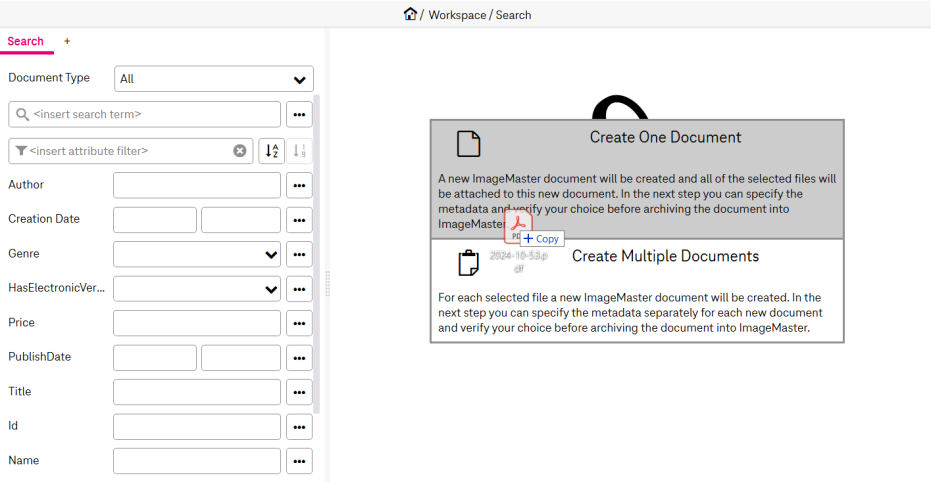
Figure 913: Creating new document in hit list using drag and drop
-
-
When one document is saved, it is removed from the list of new documents and added to the list of opened documents. Then the dialog for creating the next document is shown.
All attribute values of the previous document are copied to the current document (including a possible change of the document type). By default the new document’s type is set to the type that is currently selected in the hit list. If the hit list is empty, the type is preset to the preferred document type (see [UM AdminClient] for more details). If there is no preferred document type, the first type in the list is chosen.
-
Select the file that should be shown first in the Document Creation view and used as the primary attachment for AI processing if selected. If Classify & Extract functionality was selected, the document type and metadata fields are pre-filled automatically.
-
The upload starts immediately after dropping. Adjust the fields as desired and click Save. Only then the document or its new version will be stored in the archive including the new attachment. Always make sure that you see the confirmation according to Successful update. Otherwise, if you just close the tab or exit the browser, the changes will get lost!
You can also drag files to the common drop zones to create a single document with multiple attachments or multiple documents (one per file). In these cases, the client switches to document creation mode automatically.
Depending on the system and document type setup (e.g. visibility settings) there can be further properties to adjust in the creation dialog. For example, you may be able to assign the document to a folder via “Add Folder” or add a child document link (see chapter Adding a child link).