Actions with mailboxes
-
assign a policy to a set of mailboxes
-
process a selected mailbox (disabled for mailboxes for which jobs have been cleaned)
-
show statistical information for mailboxes (available only for single selection)
-
delete mailbox entries in the ImageMaster repository (available only for single selection)
-
clean jobs
-
approve cleanup
-
unarchive mailboxes (available only for multiple selection)
-
enable mailbox for Spider (disabled for mailboxes for which jobs have been cleaned)
-
reset open failed items
-
export e-mails
-
search e-mails
-
show reports
-
change runstate
To assign a policy to mailboxes
-
Select mailboxes by selecting the corresponding check boxes (in the first column).
-
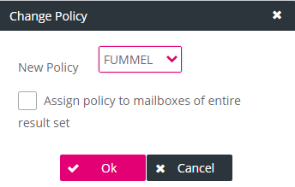
Click Actions > Assign Policy to open the Change Policy dialog. No policy is initially selected.
-
From the New Policy list, select a policy to be assigned.
-
Optionally select the check box Assign policy to mailboxes of entire result set to assign the same policy to the entire result list. See below for more details.
-
Click OK to save your changes, or click Cancel to discard the changes.
-
If the request fails, a dialog appears where you can force the assignment or abort the process:
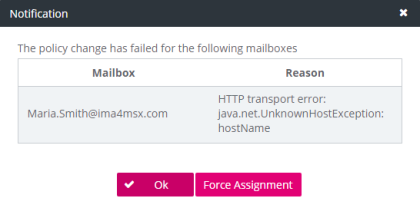 Note: Avoid a forced assignment unless this is explicitly instructed!
If a mailbox is deleted on Exchange Server, errors can occur as ImageMaster still tries to execute actions defined in a policy on this mailbox which is now inaccessible. To get rid of such error messages, a “Do Nothing” policy should be enforced on that particular mailbox.
Forcing the assignment of a compliance policy is not useful for a mailbox on Microsoft 365 as the assignment in this case is not supported at all.
-
To abort the policy assignment, click OK.
-
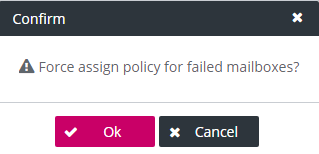
To force the policy assignment, click Force Assign and confirm with OK:
If the request is successful, the policy is assigned to the mailbox using the web service of the Content Services for E-Mail module, the mailbox entry is updated in the ImageMaster repository, and the following Notification dialog is displayed:
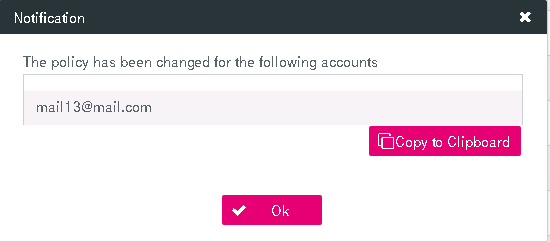
The Notification dialog contains information on successful and failed updates of the mailboxes:
-
If there were successful updates during synchronization, the window displays the mail addresses of all successfully changed mailboxes. Click Copy to Clipboard to copy the list into the clipboard. (This may be useful for pasting into own documentations, or to use these entries for a manual e-mail notification.)
-
If there were failed updates during synchronization, the window displays information for each failed update, i.e. the mailbox name and the corresponding error reason.
If you assign a policy to mailboxes by selecting all check boxes in a list, only the displayed mailboxes are affected. Note that the list can change in the background. Mailboxes may have been removed or added, while the list was opened in your browser view where it remained unchanged. As an alternative, the Change Policy dialog contains an additional confirmation check box that allows for the selection of all items:
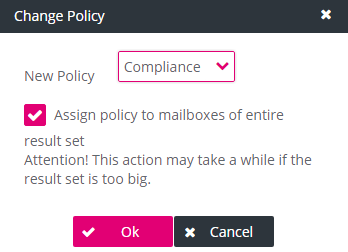
For large lists with many entries this can cause a long running process that may be aborted due to a timeout failure in extreme cases.
To process a selected mailbox
-
Choose a mailbox by selecting the corresponding check box. (The action is available for multiple selection as well.)
-
Click Actions > Add mailbox to Spider Queue.
The mailbox will be added on the top of the Spider processing queue. If the policy attached to the mailbox is a compliance policy, it is put into the compliance Spider queue, otherwise in the archive Spider queue.
To show statistics for mailboxes
-
Choose a mailbox by selecting the corresponding check box.
-
Click Actions > Show Statistics.
The dashboard is displayed (also see section Policy assignment by batch import) with statistical information for the selected mailbox.
To delete a mailbox
Before deleting a mailbox, consider the following aspects:
-
You can only delete a mailbox, if no belonging documents exist in the ImageMaster archive.
-
This deletion only takes place in ImageMaster. If the mailbox still exists in the Exchange environment, the next synchronization will create the corresponding entries in the ImageMaster repository again.
-
Before deleting a mailbox, make sure that there are no more incoming documents for it. This can be achieved by adjusting policies and rules via the AdminClient or by shutting down the belonging Spider processes and Outlook Add-Ins.
-
To clean up the system, first execut the “unselect” action before a deletion according to the section To clean jobs below.
To actually trigger the deletion, follow these steps:
-
Choose a mailbox by selecting the corresponding check box.
-
Click Actions > Delete Mailbox and confirm the action in the dialog.
If the mailbox has statistics, a deletion of the mailbox including these will be performed in the background. In this case a notification message appears that the mailbox can be deleted but this may take some time. When the deletion process has finished, the mailbox will disappear with the next refresh of the mailbox list.
The action deletes all enqueued archive jobs (interactive archive jobs and batch archive jobs) for a mailbox. However, jobs may re-occur in the queue for active mailboxes if corresponding policies or rules (e.g. for batch or interactive archiving) are still in place. So, if the “unselect” is intended as a cleanup step before final mailbox deletion, make sure that the mailbox is not in use anymore.
A cleaning can be executed as follows:
-
Select the desired mailbox entries.
-
Click Actions > Clean jobs and confirm your action in the dialog so all selected boxes will be cleared:
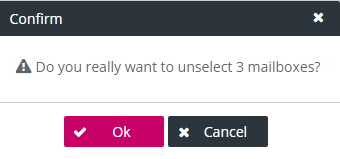
In case of an error, a notification message shows the reason and the mailbox name for which the process has failed.
To approve cleanup
-
Choose mailboxes by selecting the corresponding check boxes. The action is enabled only for mailboxes with the status “finalDoneIncomplete”.
-
Click Actions > Approve cleanup and confirm the action in the dialog. The clean up process for selected mailboxes with corresponding information will be approved. The status of the mailbox will be changed to “finalDoneApproved”.
To unarchive mailboxes
-
Choose mailboxes by selecting the corresponding check boxes.
-
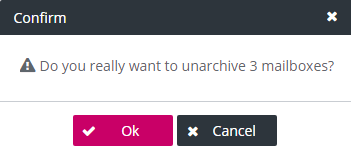
Click Actions > Restore Mailbox Permanently and confirm the action in the dialog:
To enable a mailbox for Spider
-
Choose a mailbox by selecting the corresponding check box.
-
Click Actions > Enable For Spider. The mailbox will be included in the mailbox Spider processing with the value “Manually enabled” for Hosts (Addin Version).
To reset failed mailboxes
-
Choose mailboxes by selecting the corresponding check boxes.
-
Click Actions > Reset Open Failed. The failed actions in Spider processing will be reset and the mailbox list will be updated automatically.
To search e-mails
-
Choose a mailbox by selecting the corresponding check box (the action is limited to a maximum of 5 selected mailboxes).
-
Click Actions > Search e-mails. The search room in WorkplaceClient opens with prefilled imaMailboxIDs in the search term field.
-
Optionality adjust the search fields and click Search. See Search execution in[UM WorkplaceClient] for more details on search execution.
To show reports
-
Choose a mailbox by selecting the corresponding check box (the action is disabled for a multiple selection).
-
Click Actions > Show reports. The reports room in WorkplaceClient opens. Currently enabled filters are removed. Report name filter is applied with prefilled imaMailboxID of the selected mailbox. The reports for the currently selected mailbox are displayed. See Reports in[UM WorkplaceClient] for more details on reports functionality.
To change runstate
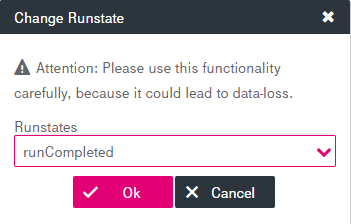
Be careful with this feature as it may result in data loss.
-
Select a mailbox by selecting the corresponding check box (the action is enabled for a multiple selection).
-
Click Actions > Change runstate, and select the new runstate for the selected mailboxes in the appeared dialog:
- Confirm your action in the dialog.