Add-in registration with Azure
To perform Outlook web service operations, you need to register an application in the Azure portal, so the Microsoft identity platform1 can provide authentication and authorization services for your application and its users. See [MS Identity Platform] for more details. You need to provide the values obtained during the registration procedure during Coordinator installation.
Follow the steps below:
-
Log in to Azure Active Directory admin center. In the multitenant environment, ensure that you execute the actions under the tenant in which you want to register an application.
-
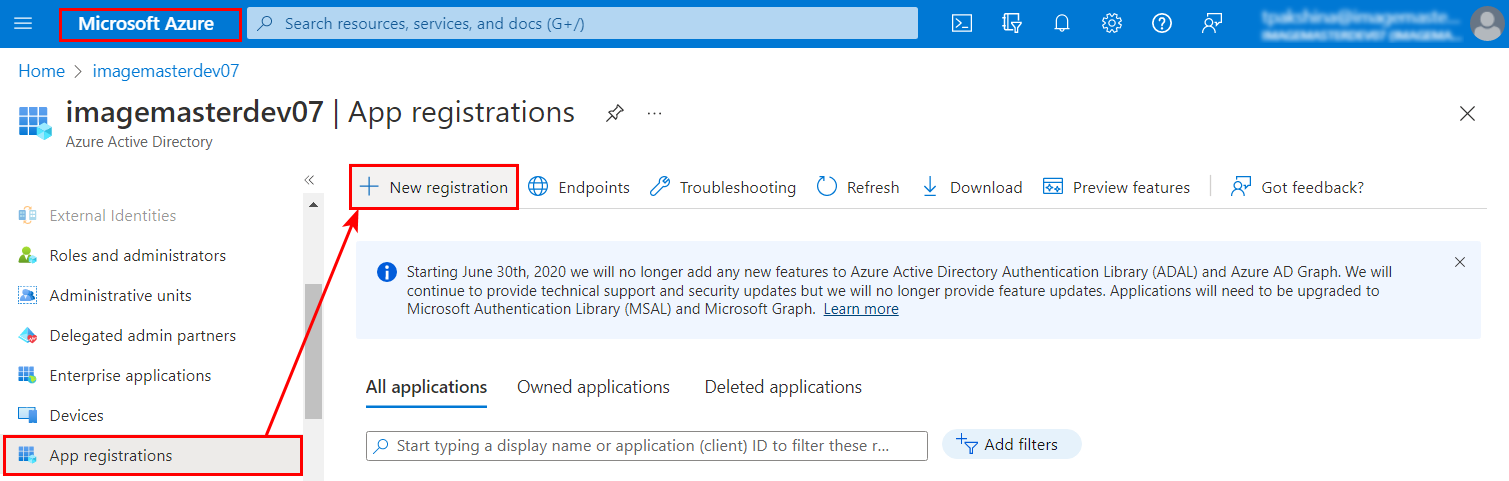
Create a new application registration by clicking New registration in App registrations:
-
On the Register an application page, set the values as follows:
-
-
Supported account types: set to "Accounts in any organizational directory (Any Azure AD directory – Multitenant) "
-
Redirect URI: ensure that "Web" is selected in the drop-down list and then set the URI to
https://coordinatorHost:coordinatorPort/ImageMaster.Office365.Coordinator/api/auth/authorize
The port number in the redirect URI may be different on your machine. You can find the correct port number for your machine by selecting the AttachmentDemoWeb project in Solution Explorer and looking at the SSL URL setting in the properties window. -
-
Click Register:
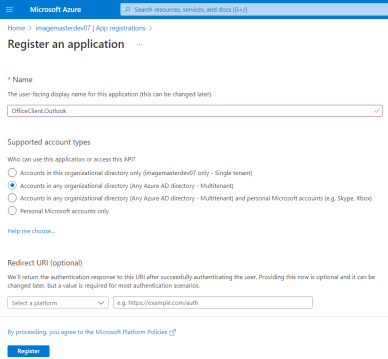
Figure 633: Azure AD admin center — register an application
-
After successful registration you will be redirected to an overview page where you can find application (client) ID and directory (tenant) ID:
Figure 634: Azure AD admin center — registered application overview
Figure 632: Azure AD admin center — new application registration
-
Copy these values and enter them as Client ID and Tenant ID during OfficeClient Coordinator installation. For more information see Outlook Web settings.
-
Under Manage section, select Authentication. Scroll to Implicit grant and hybrid flows and enable the check of Access tokens. Then select Save:
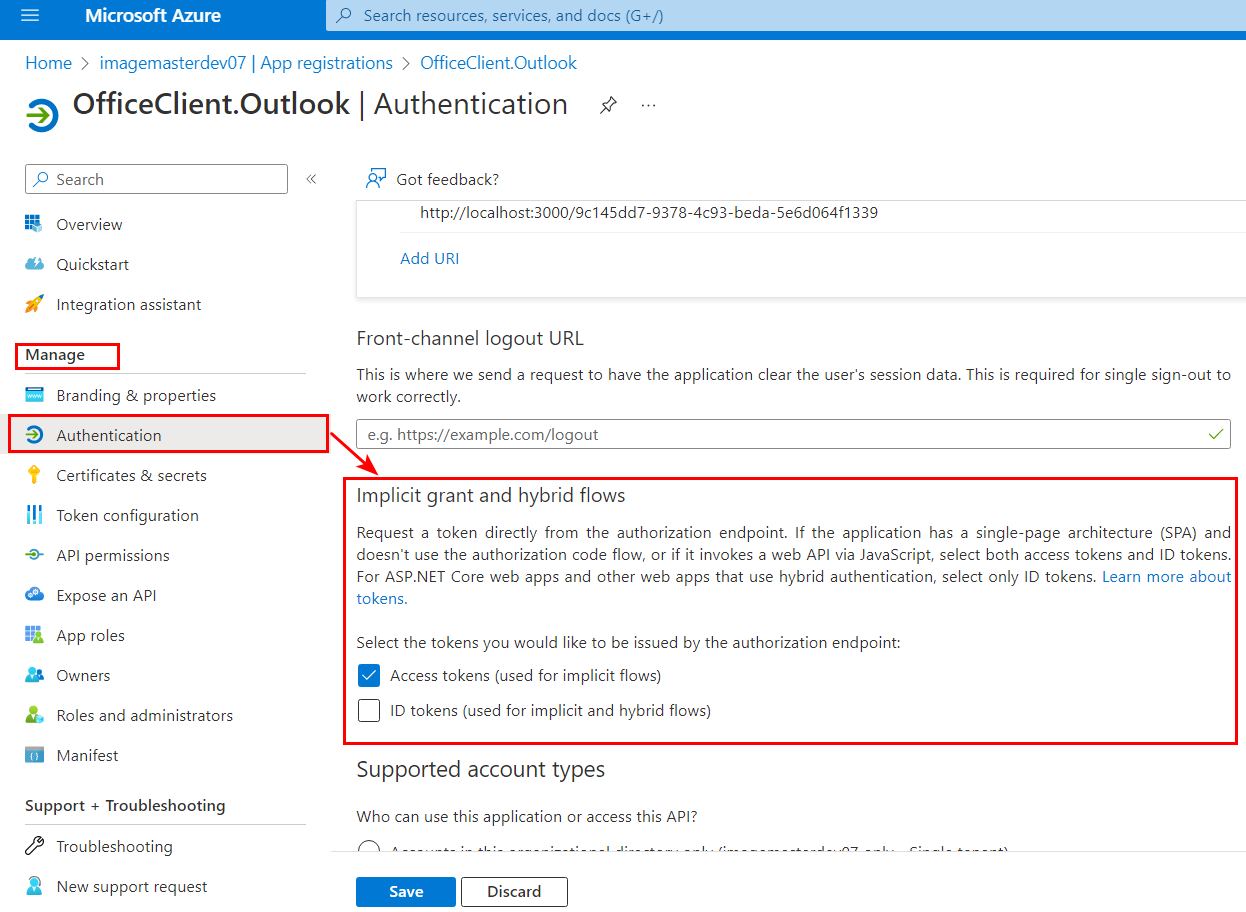
Figure 635: Azure AD admin center — authentication settings
-
Go to Certificates & secrets in Manage section. Click New client secret to configure a secret string that is used by the application to prove its identity:
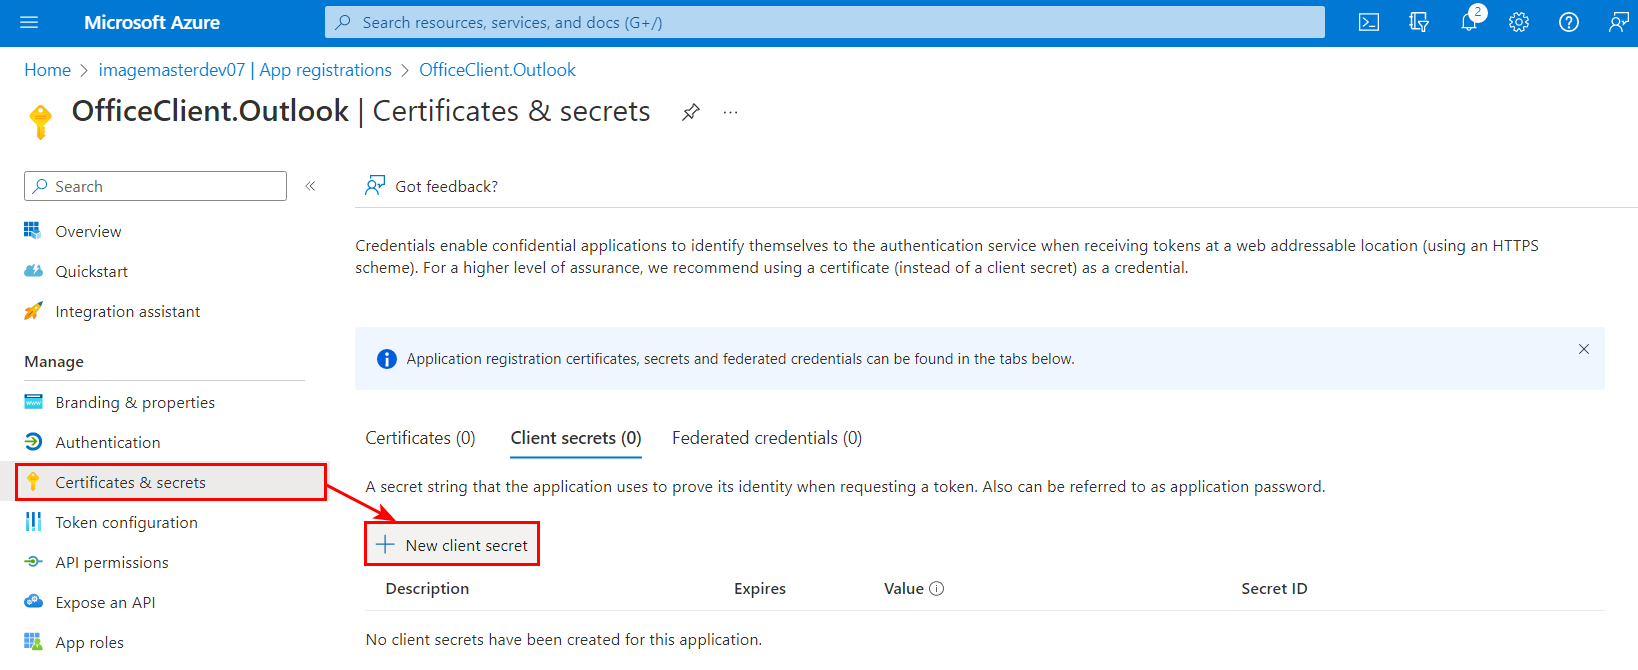
Figure 636: Azure AD admin center — certificate and secrets configuration
-
Specify a description for the created secret and choose an expiration policy for it. Click Add:
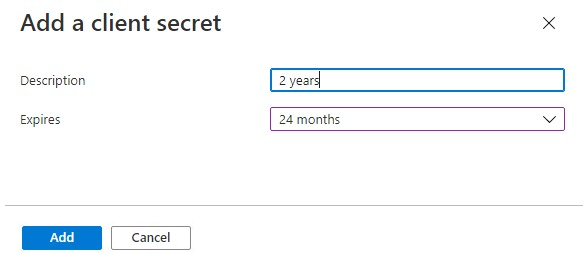
Figure 637: Azure AD admin center — add a client secret
-
The client secret value will be displayed. Copy the generated value.
The value can be retrieved only when created. The value is unchangeable afterwards.
Figure 638: Azure AD admin center — client secret value
Copy the value and enter it as Password for Add-in registration with Azure during Coordinator installation.
-
Under Manage, select Expose an API. Click Set next to Application ID URI:
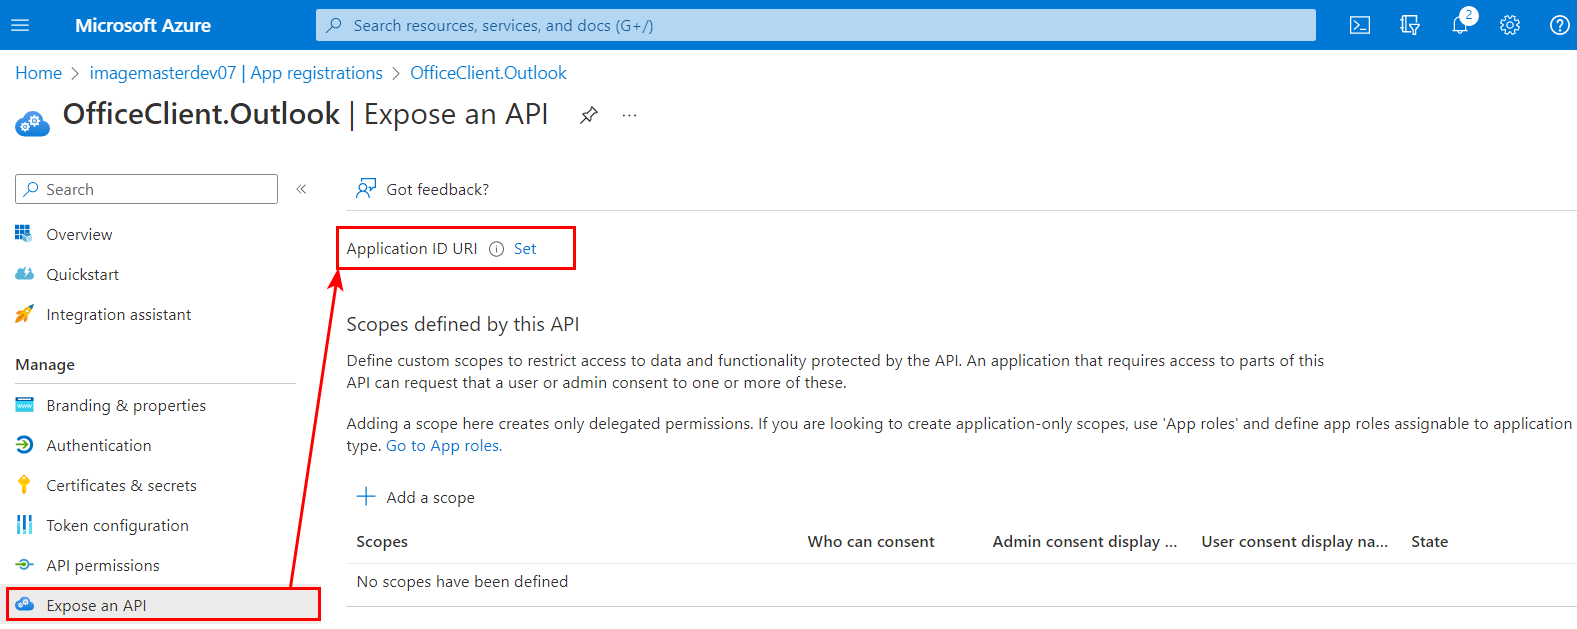
Figure 639: Azure AD admin center — set application ID URI
-
In the opened window, change the default value by inserting your host and port number before the GUID listed there.
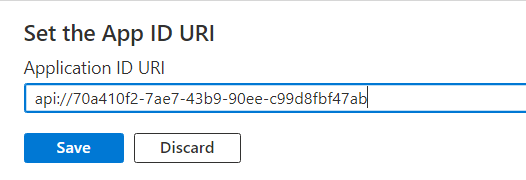
Figure 640: Azure AD admin center — change the default application ID URI
For example, if the default value is
api://05adb30e-50fa-4ae2-9cec-eab2cd6095b0
and your app is running on localhost:44349, the value is
api://localhost:44349/05adb30e-50fa-4ae2-9cec-eab2cd6095b0.
Click Save.
-
Select Add a scope. In the opened panel, configure the following fields:
-
Enter access_as_user as the Scope name.
-
Set Who can consent? to "Admins and users".
-
Fill in the fields for configuring the admin and user consent prompts with values that are appropriate for the access_as_user scope which enables the Office client application to use your add-in's web APIs with the same rights as the current user.
Consider the following examples:
-
Admin consent display name: Office can act as the user.
-
Admin consent description: Enable Office to call the add-in's web APIs with the same rights as the current user.
-
User consent display name: Office can act as you.
-
Admin consent description: Enable Office to call the add-in's web APIs with the same rights that you have.
-
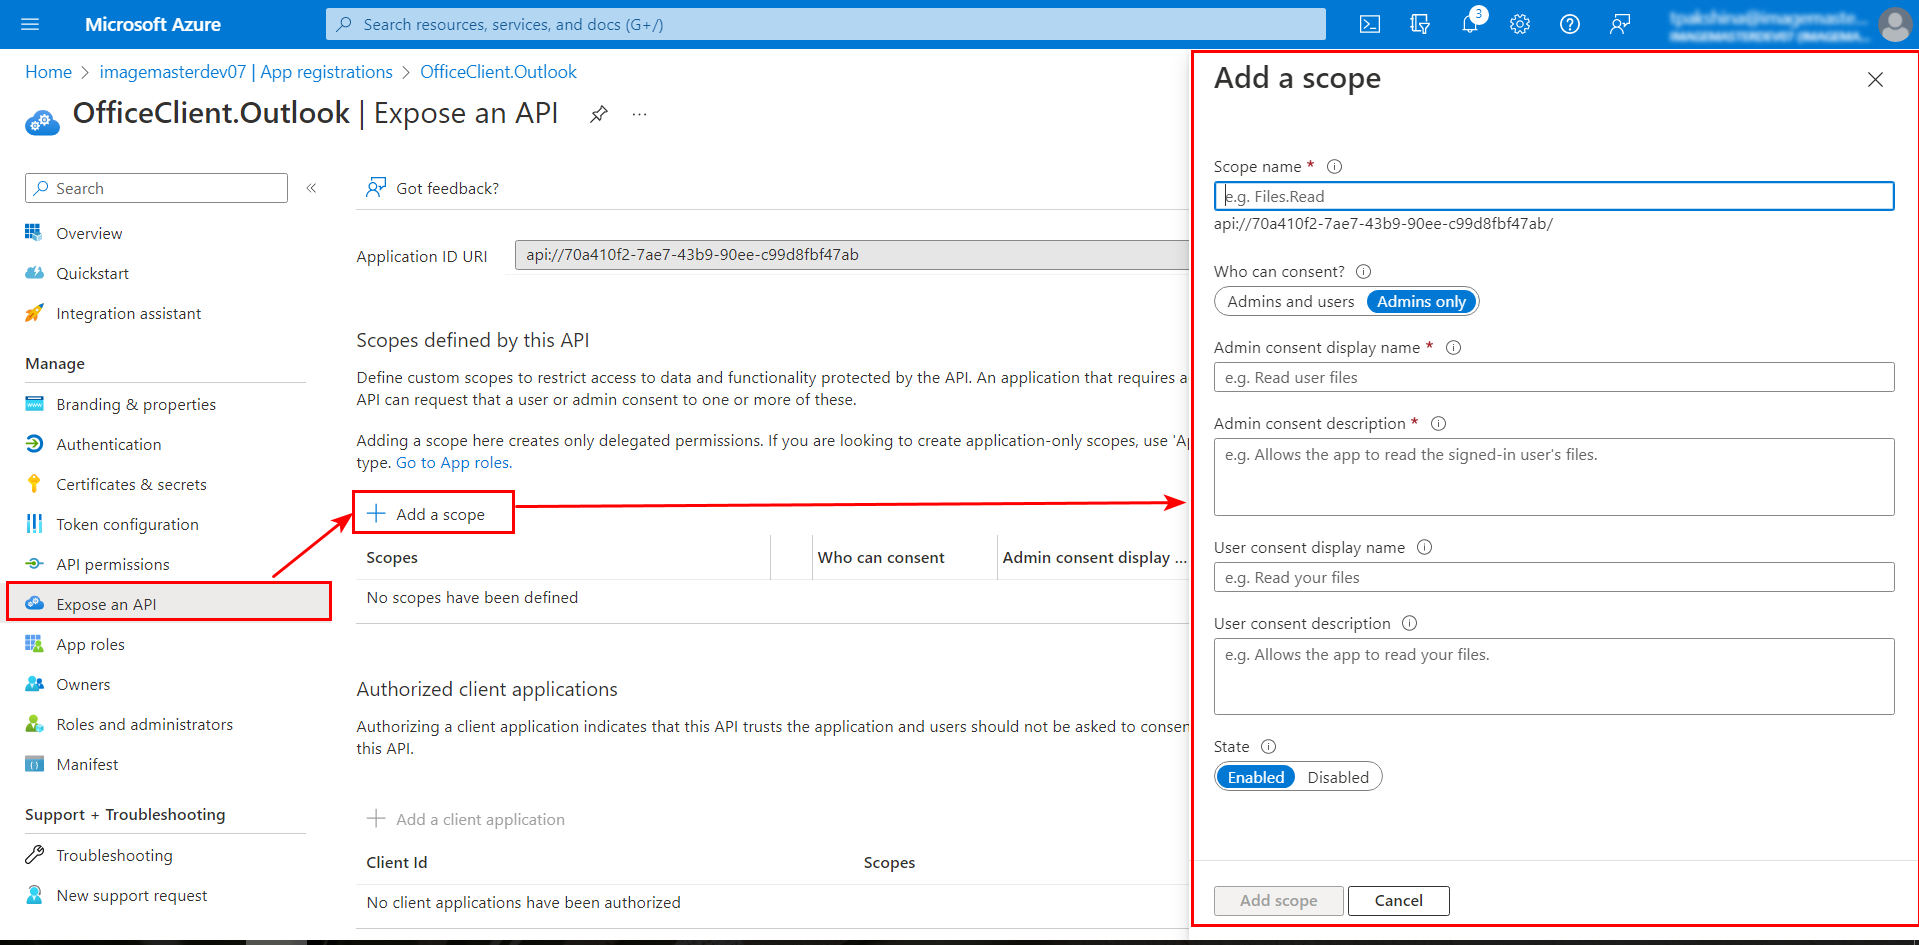
Figure 641: Azure AD admin center — add a new scope
-
Ensure that State is set to Enabled and select Add scope.
-
-
In the Authorized client applications section, identify the applications that you want to authorize to your add-in's web application.
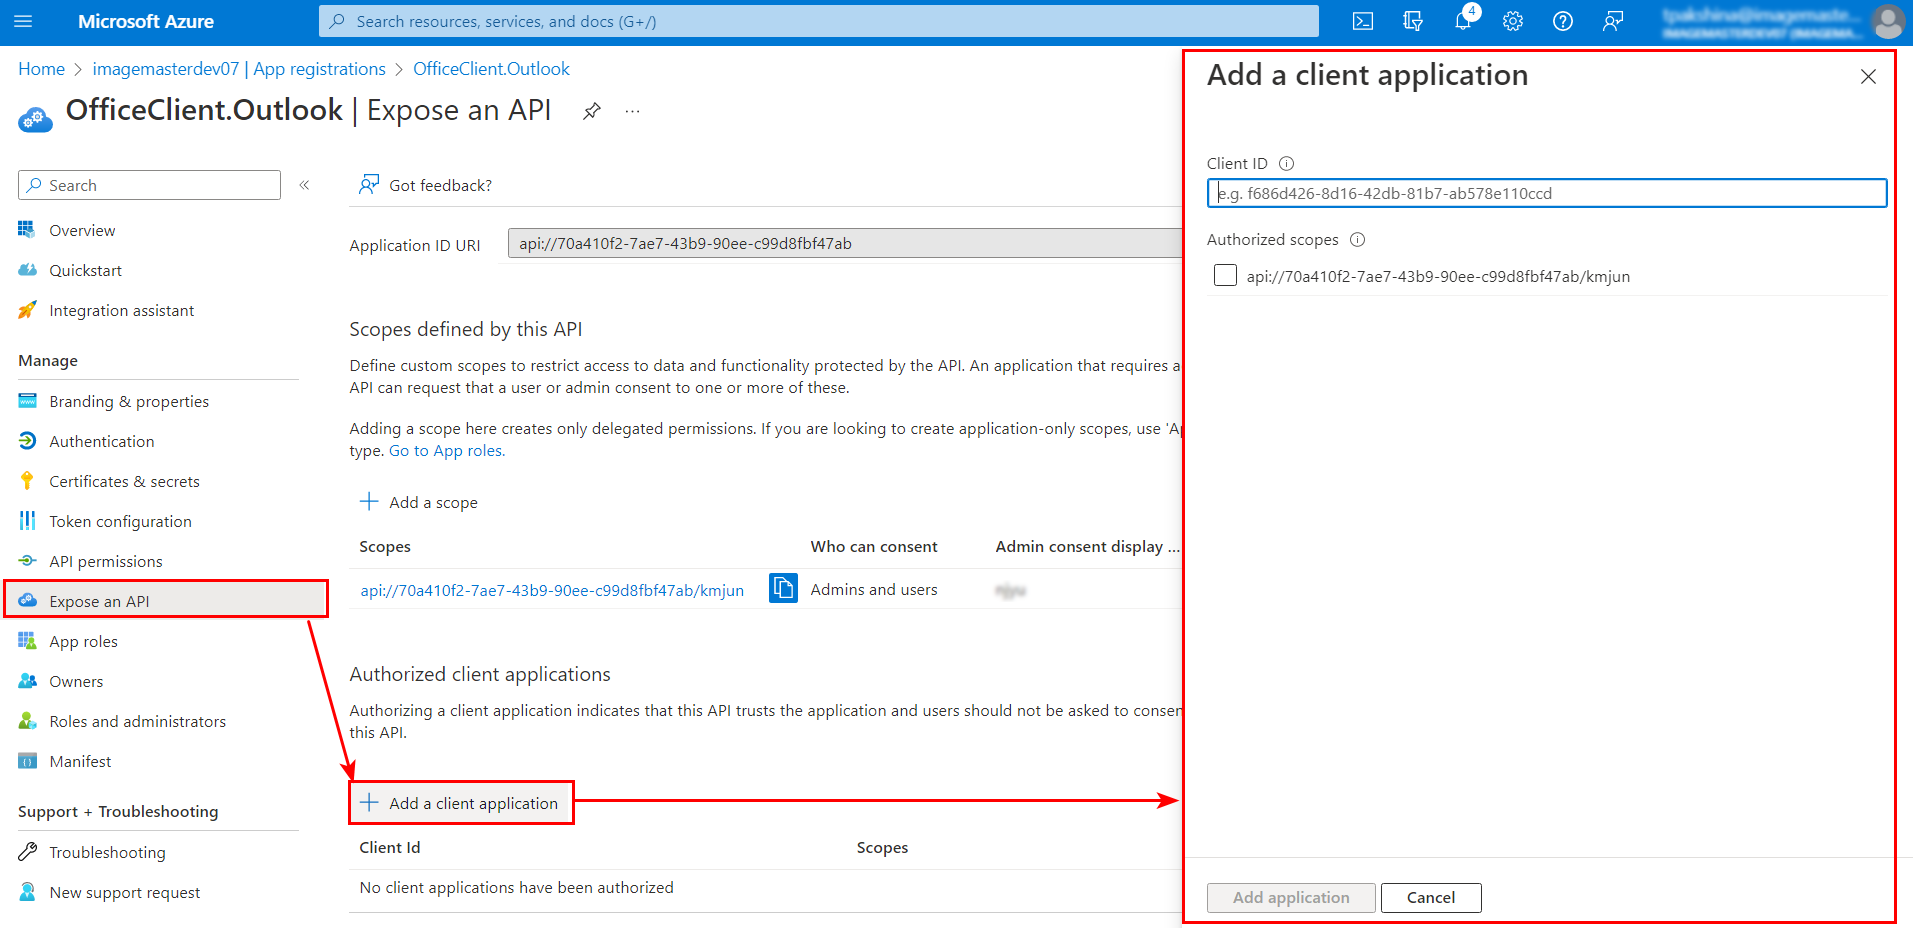
Figure 642: Azure AD admin center —add a client application
Each of the following IDs needs to be pre-authorized:
ID Application d3590ed6-52b3-4102-aeff-aad2292ab01c Microsoft Office bc59ab01-8403-45c6-8796-ac3ef710b3e3 Outlook on the web ea5a67f6-b6f3-4338-b240-c655ddc3cc8e All Microsoft Office application endpoints 57fb890c-0dab-4253-a5e0-7188c88b2bb4 Office Online 08e18876-6177-487e-b8b5-cf950c1e598c
SharePoint Online Web Client Extensibility
Table 386: Client application IDs' mapping
For each ID, take the following steps:
-
Select Add a client application, set the Client ID to the respective GUID and check the box for api://localhost:44349/$App ID GUID$/access_as_user.
-
Select Add application.
-
-
Under Manage, select API permissions and click Add a permission. On the opened panel, choose Microsoft Graph:
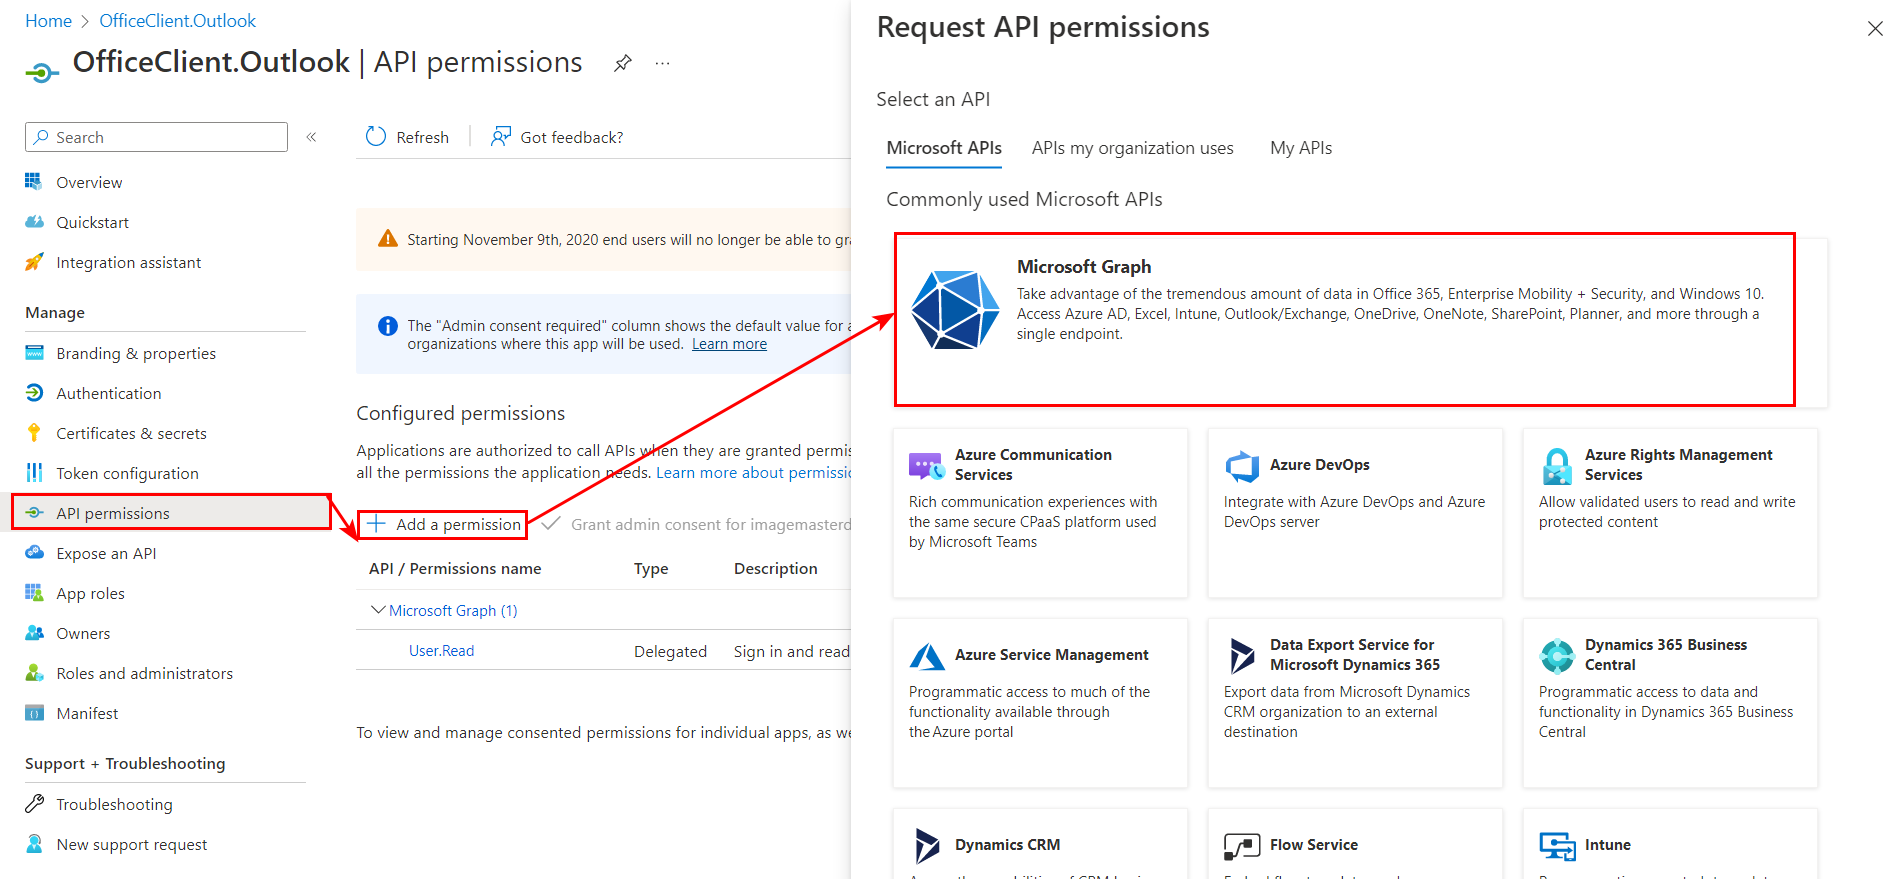
Figure 643: Azure AD admin center — add permissions
Select Delegated permissions. Use the Select permissions search box to search for desired permissions:
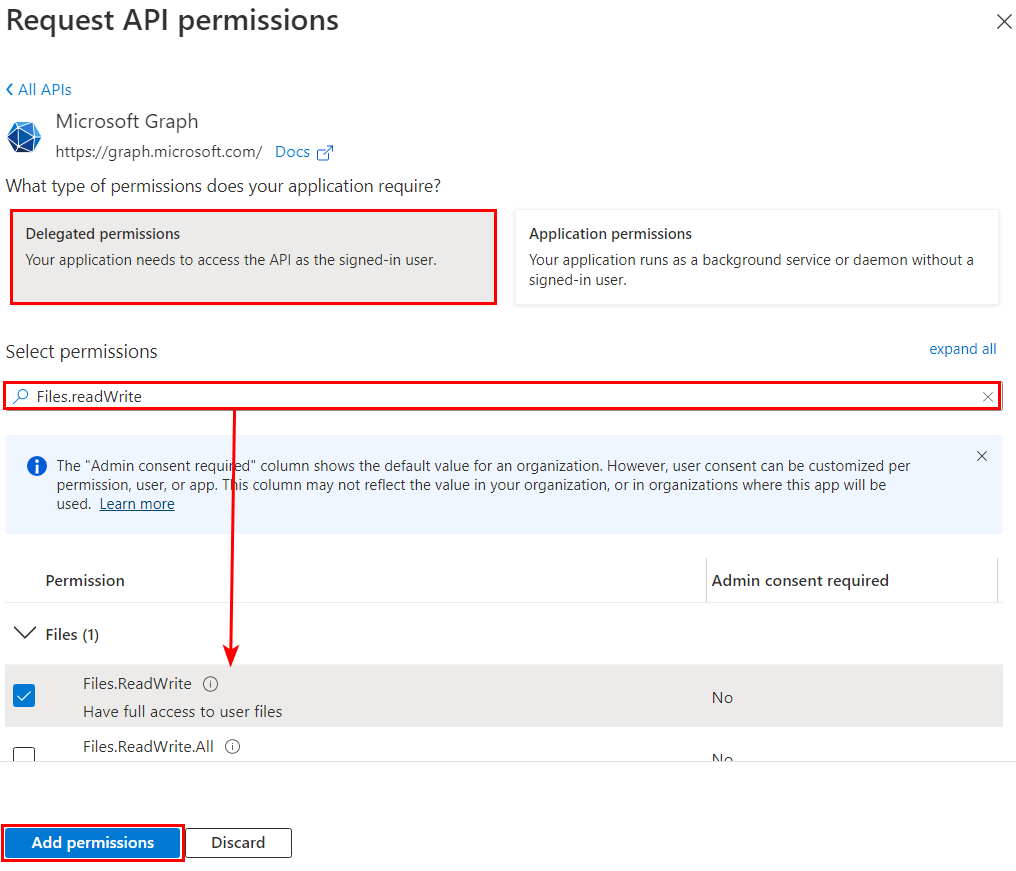
Figure 644: Azure AD admin center — select permissions
The following permissions are required:
-
Files.ReadWrite
-
Mail.Read
-
offline_access
-
openid
-
profile
Select the check box for each permission as it appears and click Add permissions at the bottom of the panel.
On the same page, choose the Grant admin consent for [tenant name] button, and then confirm with Accept.

Figure 645: Azure AD admin center — grant admin consent
After choosing Grant admin consent for [tenant name], you may see a banner message asking you to try again in a few minutes so that the consent prompt can be constructed. If so, you can start working on the next section, but don't forget to come back to the portal and press the button! -