Only if you have enough permissions to set legal holds to documents, the menu items listed below will be enabled.
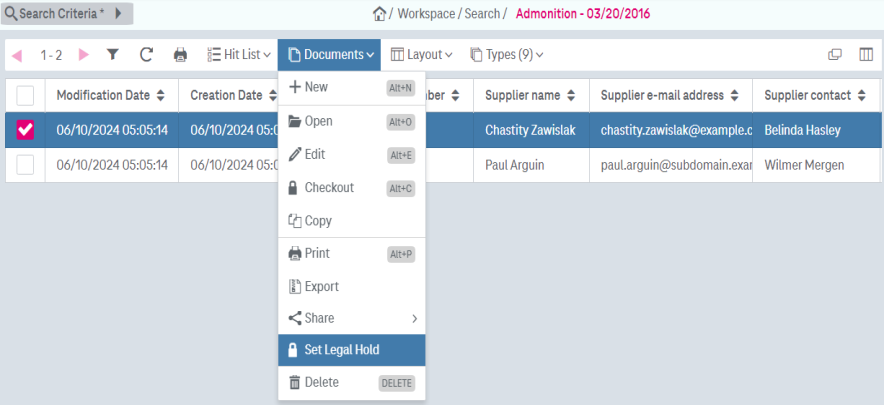
To set a legal hold for several documents in a hit list
-
Select the boxes for documents that should be protected from deletion.
-
Expand the menu Document and select Set Legal Hold from the menu.

Figure 917: Setting a legal hold from a hit list
-
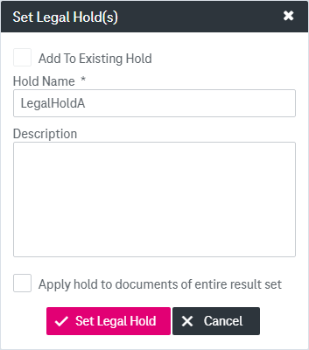
Define details of the legal hold in the dialog Set Legal Hold(s) as illustrated next.
Defining legal hold details for the current document
-
From the document preview or view: expand the menu Document, select Legal Hold and Set Legal Hold.
-
The window Set Legal Hold(s) is displayed:

Figure 918: Defining legal hold details for a document
-
Do one of the following:
-
To create a new legal hold, enter a name in the Hold Name text field.
-
Alternatively, to add the documents to a previously created legal hold, select the box Add to Existing Hold: the Hold Name field becomes a drop-down list containing all legal holds (including inactive ones). Select a legal hold from the list.
-
-
Optionally enter a description in the Description field.
If you create a legal hold from a hit list, you are able to set a legal hold to the entire hit list. To do so, select the box Apply hold to documents of entire result set.
Setting a legal hold for many documents may take a while and a long running process can be aborted by a timeout. To avoid this the system administration must adjust the system.
-
Click the button Set Legal Hold. To cancel the operation, click Cancel.
When ready, the Set Hold dialog is closed and the “Delete Protected” status should be displayed for the document. If the status has not changed, try a refresh by expanding the menu Document and selecting Refresh Document from the menu.
For information on how to view details of the assigned legal holds and how to remove legal holds, see chapters Details of legal holds for a document and section Managing legal holds in [UM AdminClient].