Bulk export (also known as “legal export” or “litigation export” in certain contexts) is foreseen to retrieve large sets of documents for a handover to a third party. The result set of files included in the export is based on a query with search criteria that a user must specify.
Prerequisites
-
An internal directory path must be configured in the section Compliance settings.
When an export has finished, the resulting export package is internally fetched from here to make it available for download.
-
The configuration room explained below is only available if you have bulk export update permissions.
To enter the export room, expand the panel Maintenance in the sliding navigation menu, go to Compliance Cockpit and select Bulk Export.

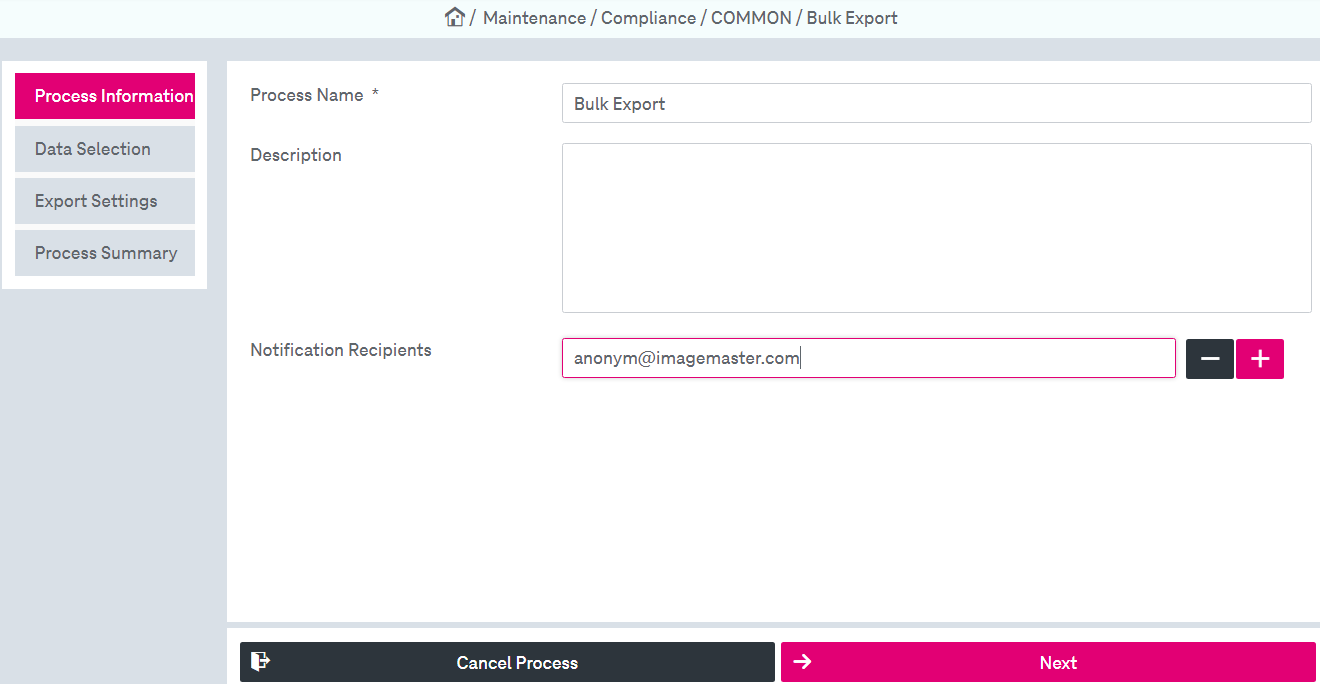
Figure 245: Maintenance – bulk export
The configuration requires going through several steps that are indicated in the upper or left area of the window. Navigate through these steps by clicking Next / Back in the lower part of the window.
You can only go to the next step if all mandatory fields are filled in the current step. As a workaround, you can always set a dummy value to skip to the next step and later navigate back to a previous step to change this dummy value again.
The following basic actions can be taken:
-
specify general information of an export process
-
select data for export
-
specify target directory
-
start export
Specify process information
-
Specify the process metadata (also see the figure above):
-
Process Name (mandatory): export process identifier name
-
Description (optional): description of the process
-
-
Status information about the completion of the export can be sent to the defined e-mail addresses.
Enter an e-mail address into the Notification Recipients field.
You can add fields for additional e-mail addresses by clicking the corresponding icon
 .
. -
Click Next to save your changes and proceed with the following step.
Select data for export

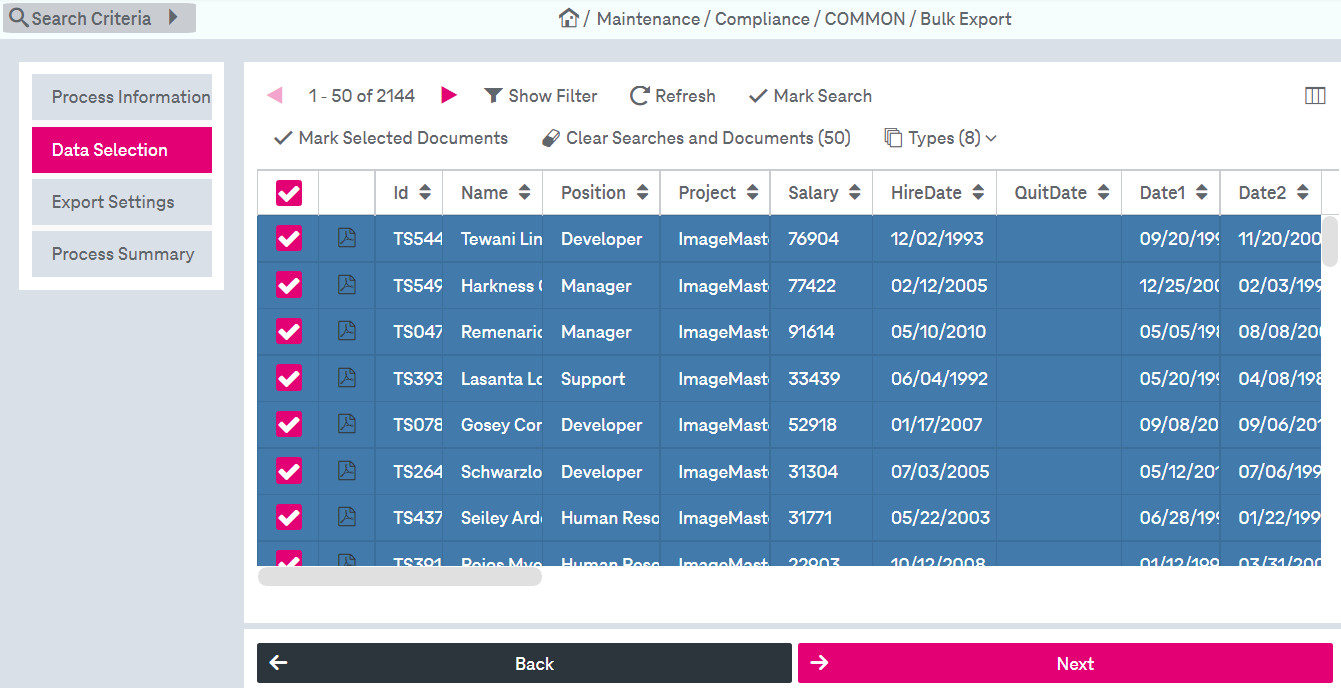
Figure 246: Maintenance – bulk export: data selection
-
Search over the documents using general ImageMaster search functionality (see [UM WorkplaceClient] for more details).
-
The Data Selection view provides all the controls usually available in the search room:
-
search criteria panel (index search and full-text search are supported)
-
list with search results
-
document preview panel for selected documents
-
-
Mark the documents for the data selection process. The following additional options are available:
-
Mark Search (available only in case a search has been run): the entire search result set will be selected
-
Mark selected documents (available only in case at least one document is selected): only some items will be selected
-
Mark Document (available in the document preview panel): the currently previewed document will be selected
If successful, the corresponding message will be displayed stating the number of added documents:

-
-
Click Clear Searches and Document(s) to clear the list of added documents/ searches.
-
Click Next to save your changes and proceed with the next step.
Note that you can switch to the next step only when some data is marked for selection.
Specify export settings
This step allows choosing a directory where the exported files are stored and configure some general settings. Note that the directories must be preconfigured, see Compliance settings for more details.

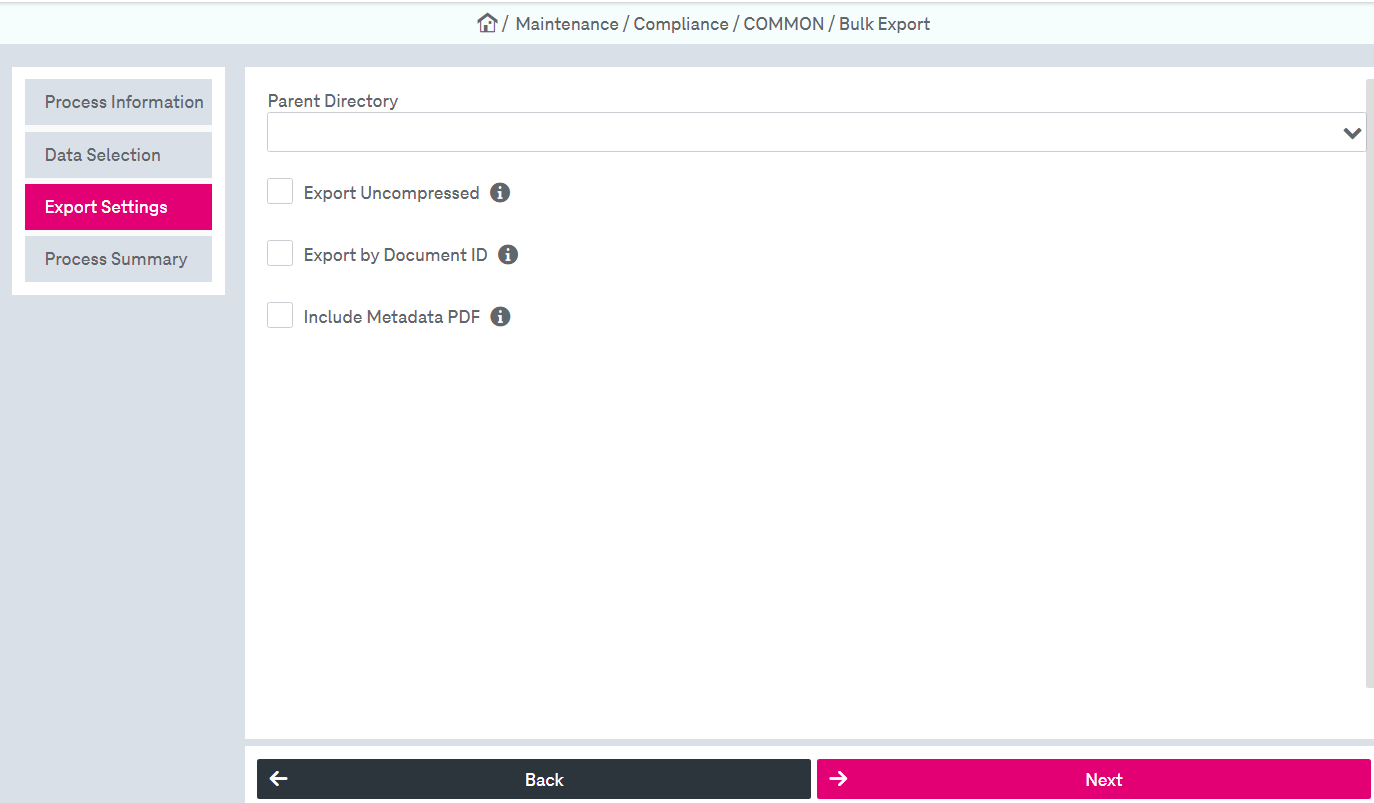
Figure 247: Maintenance – bulk export : export settings
-
Select target directory in the list.
-
Optionally configure the following settings:
-
Select Export uncompressed to export selected documents as plain folders. If disabled the documents will be exported as a ZIP file (default).
-
Select Export by document ID to add a directory named with a document ID for each document to be exported. By default the export structure or document identifier of the current document type is used for the directory name.
-
Select Include Metadata PDF to enable export of attachment’s metadata
-
-
Click Next to save your changes and proceed with the following step.
Process summary
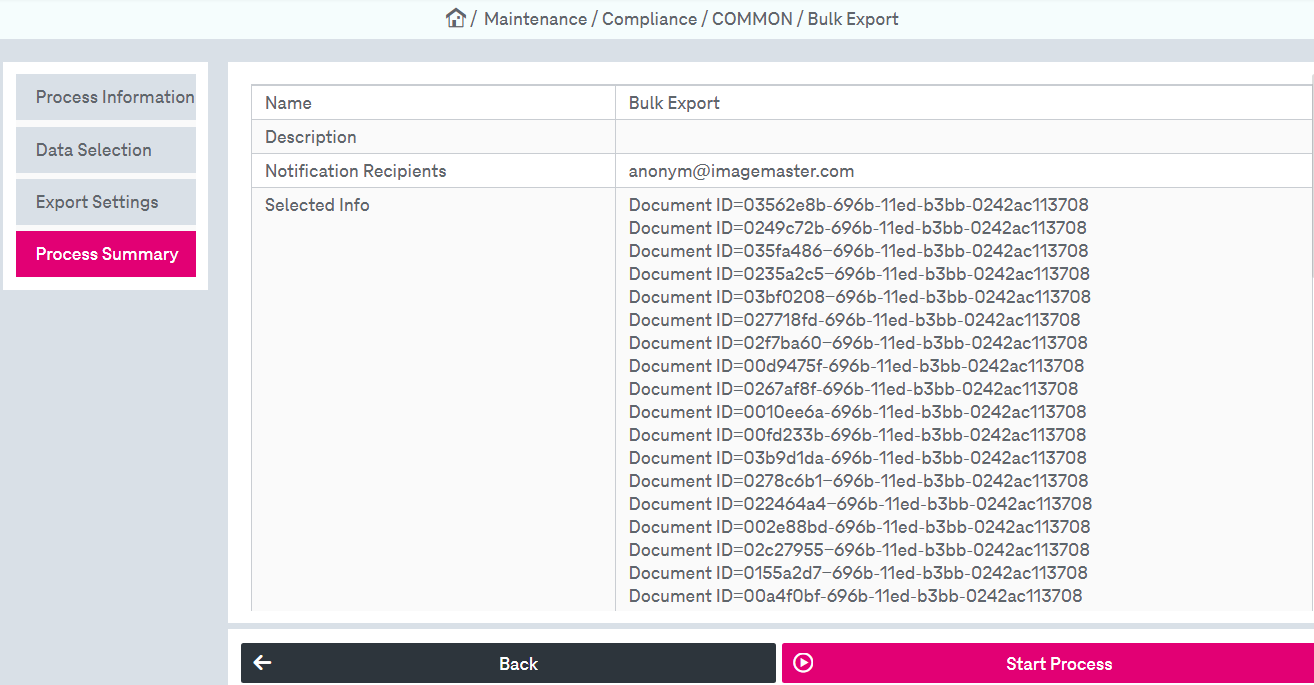
This step summarizes all settings and starts the process.

Figure 248: Maintenance – bulk export: process summary
To run an export:
-
Click Start process to trigger the export process.
The process is run in the background. When the process is finished a message appears.
-
Click the link to download the report. Specify the directory where the report file will be saved.
-
The process status is displayed in the Compliance Processes tab in the Activities configuration room. See Activities – compliance processes in [UM WorkplaceClient] for more details.